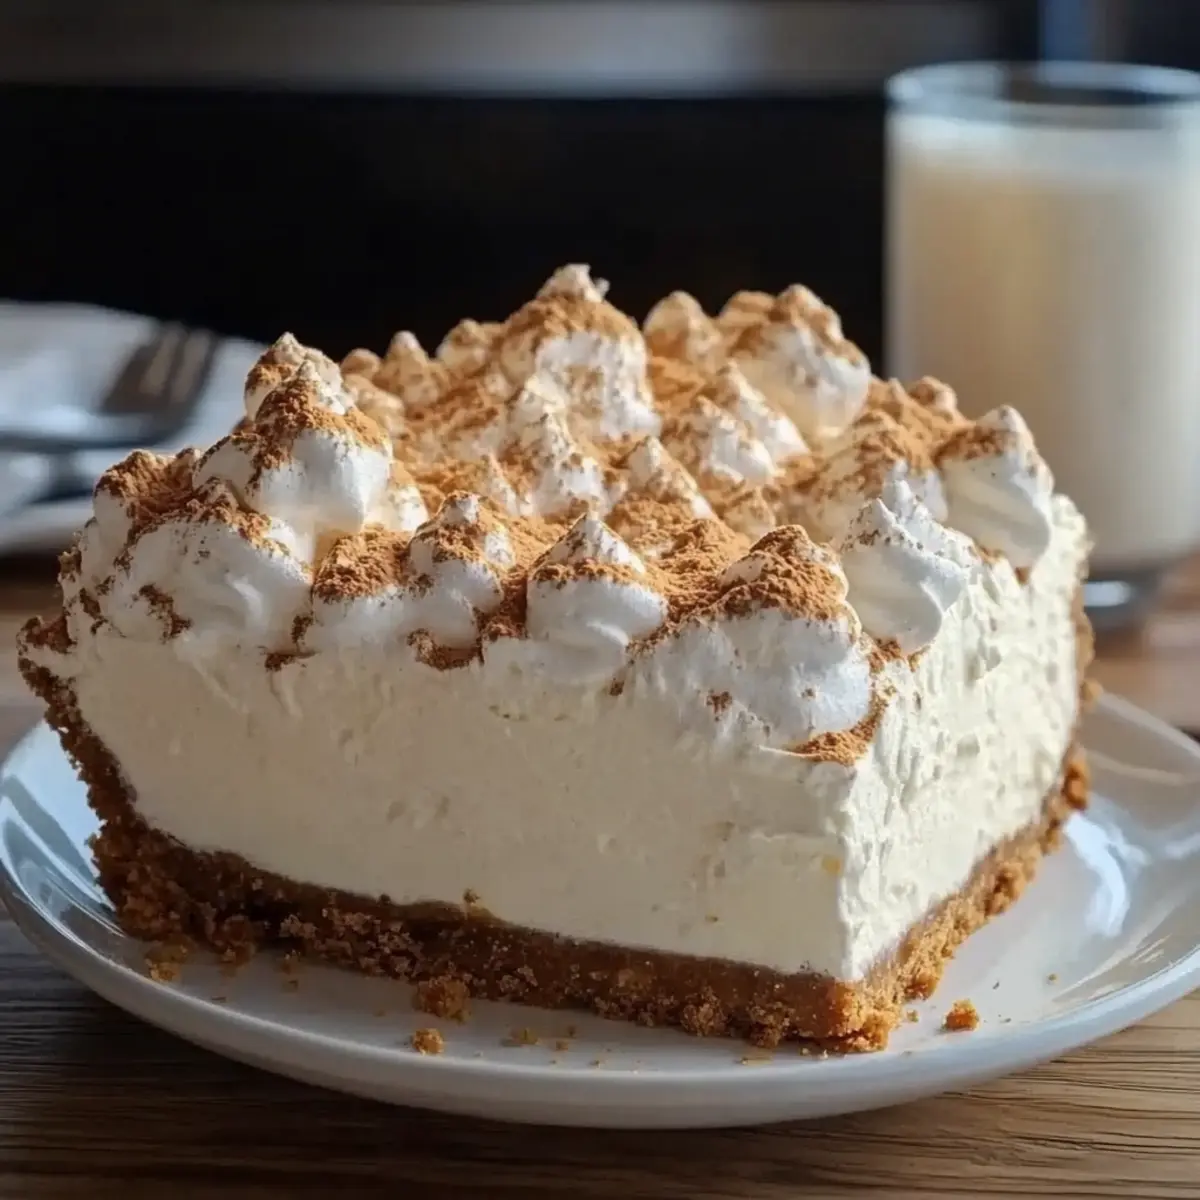
Picture this: a warm summer evening, laughter bubbling over as your friends gather around the table, and there it is—the star of the show—your stunning Fluffy No-Bake Marshmallow Whip Cheesecake, glistening under the soft glow of candlelight. If you’ve ever craved a dessert that perfectly balances lightness and indulgence, this delightful cheesecake is about to become your go-to recipe. With its creamy, marshmallow-infused filling that’s nestled in a crunchy graham cracker crust, it’s not just easy to whip up; it’s also a crowd-pleaser that requires no baking at all.
What's even better? It’s incredibly versatile, welcoming variations so you can cater to any occasion, including gluten-free options! Imagine how quickly your guests will devour each fluffy slice, leaving them dreaming of that next bite. Whether it's a family gathering or a potluck with friends, this Marshmallow Whip Cheesecake Heaven will have everyone raving. So, are you ready to embark on this delightful journey and impress your loved ones? Let’s dive into the recipe!
Why is Marshmallow Whip Cheesecake Heaven irresistible?
Irresistible, Delightfully Easy: This no-bake cheesecake is a breeze to make, perfect for both novice and experienced bakers alike.
Fluffy, Creamy Texture: The combination of marshmallow fluff and whipped cream creates a dessert that's light yet indulgent.
Versatile Variations: Swap out the crust for gluten-free options or personalize toppings to match your occasion.
Crowd-Pleasing Appeal: Ideal for gatherings—your friends and family will be raving about this dessert long after it’s gone!
Make-ahead Convenience: Prepare it in advance for stress-free entertaining! If you want to add a special touch, consider making it with a delicious chocolate marshmallow frosting for an even more decadent experience.
Visual Appeal: Topped with mini marshmallows or crushed graham crackers, it will charm both the eyes and taste buds!
Marshmallow Whip Cheesecake Ingredients
• Get ready to whip up some heavenly goodness with this creamy dessert!
For the Crust
- Graham Cracker Crumbs – Essential for a crunchy base; opt for gluten-free crackers for a gluten-free version.
- Granulated Sugar – Sweetens the crust and helps it brown beautifully.
- Unsalted Butter, Melted – Binds the crust together and enhances flavor.
For the Filling
- Cream Cheese, Softened (16 oz) – Provides rich creaminess; ensure it's at room temperature for easy mixing.
- Powdered Sugar – Sweetens the filling while contributing to its smooth texture.
- Vanilla Extract – A must-have to elevate the flavor of your cheesecake!
- Marshmallow Fluff (1 ½ cups for filling; 1 cup for topping) – Gives that signature marshmallow flavor and contributes to the fluffy texture.
- Heavy Cream, Whipped (1 cup for filling; 1 cup for topping) – Lightens up the filling and topping, making it delightfully fluffy.
Optional Garnish
- Mini Marshmallows or Crushed Graham Crackers – Adds an extra touch of sweetness and charm; sprinkle on just before serving!
Whether you’re indulging in this Marshmallow Whip Cheesecake Heaven for a special occasion or simply for dessert, these ingredients will guide you to create a scrumptious masterpiece your loved ones will adore!
Step-by-Step Instructions for Fluffy No-Bake Marshmallow Whip Cheesecake
Step 1
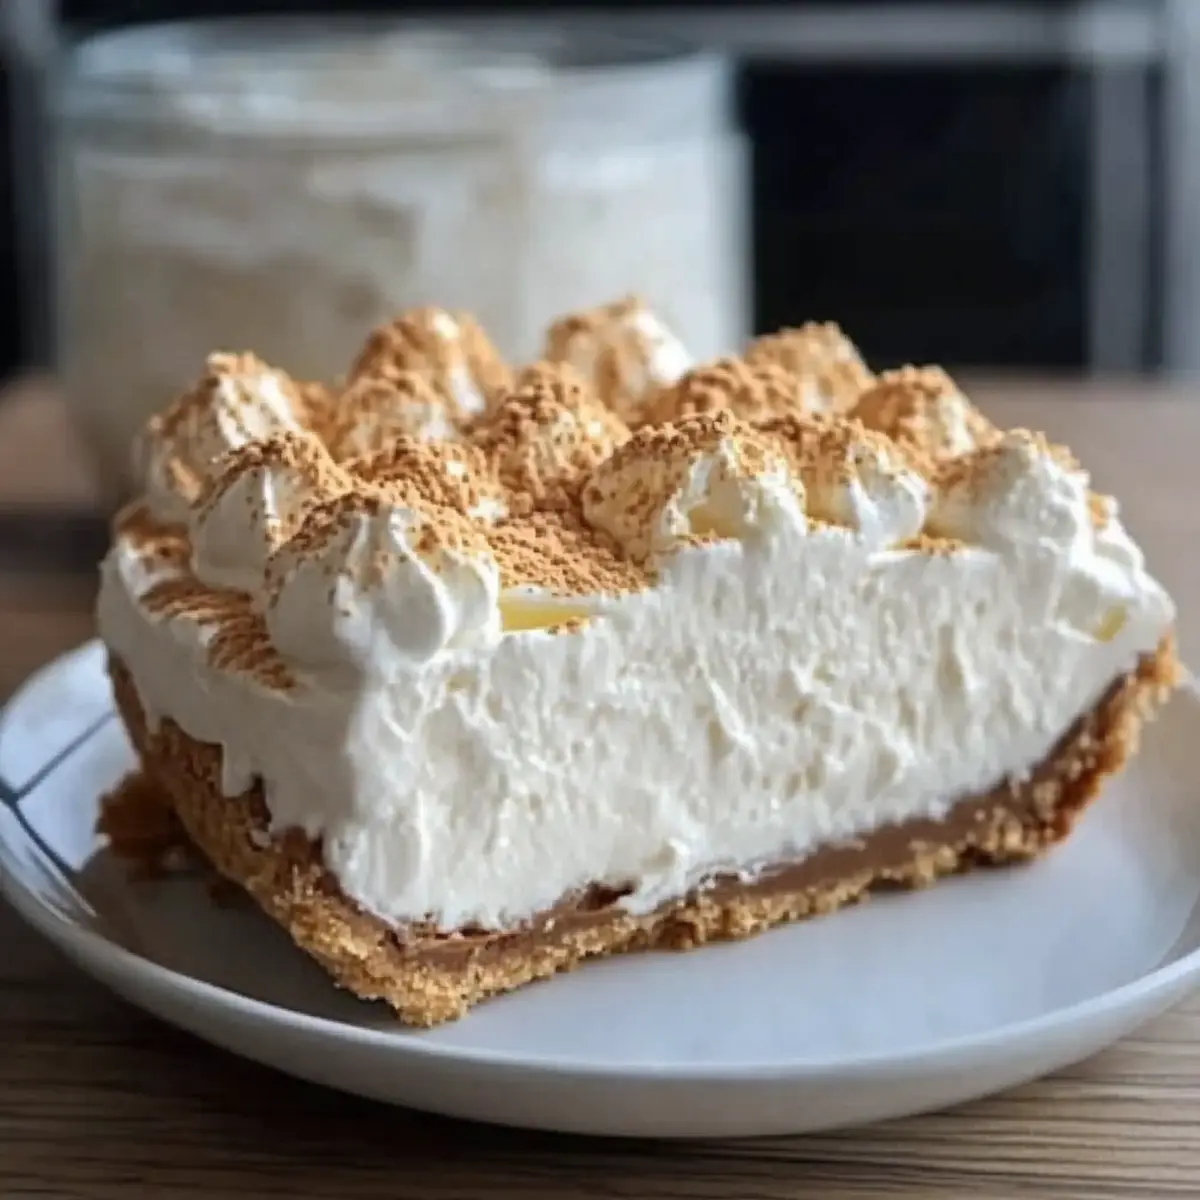
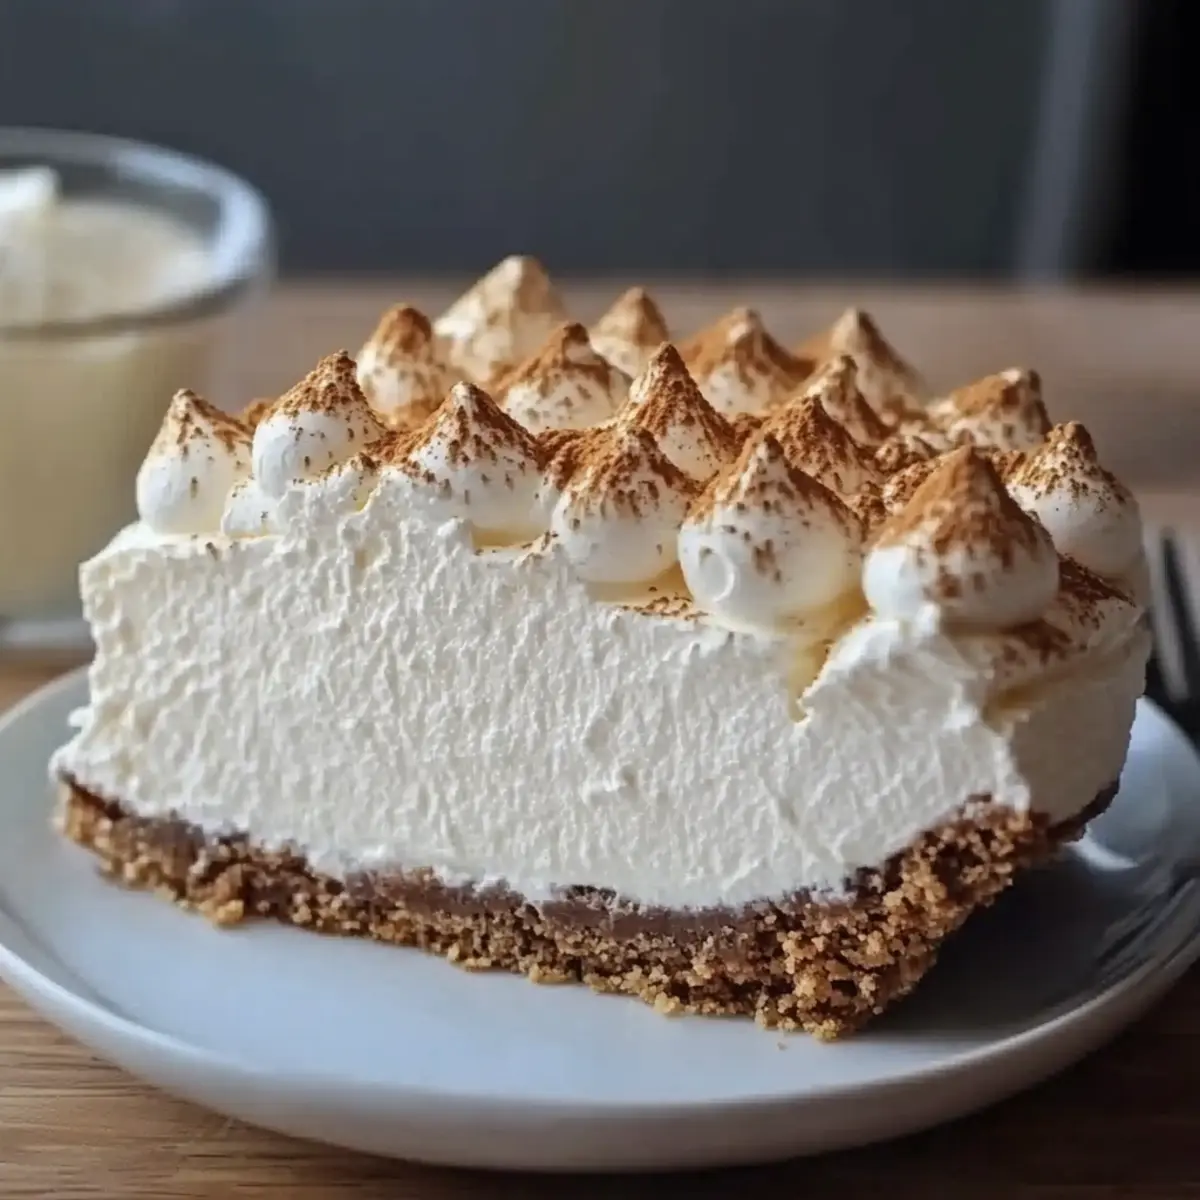
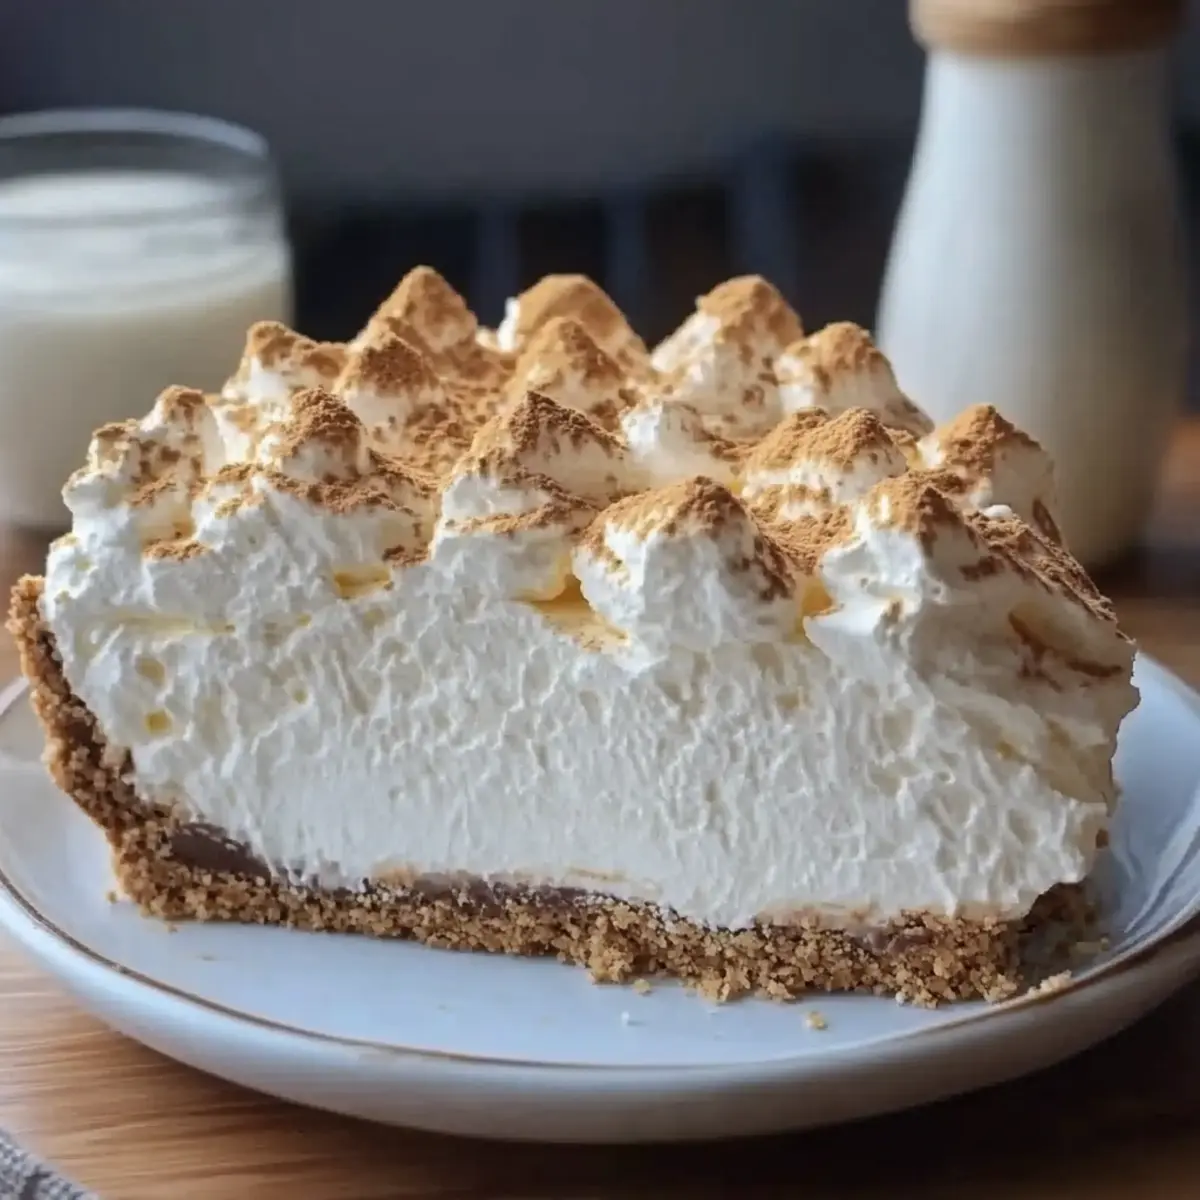
Start by preparing the crust for your Fluffy No-Bake Marshmallow Whip Cheesecake. In a mixing bowl, combine the graham cracker crumbs, granulated sugar, and melted unsalted butter. Use a fork to mix until all the crumbs are evenly coated and resemble wet sand. Press this mixture firmly into the bottom of a 9-inch springform pan to create an even base. Once made, place the crust in the refrigerator to chill for about 30 minutes, allowing it to firm up.
Step 2
While the crust is chilling, focus on the creamy filling. In a large mixing bowl, use an electric mixer to beat the softened cream cheese and powdered sugar together until it becomes smooth and creamy, which should take about 2-3 minutes. Then, mix in the vanilla extract and marshmallow fluff, blending until fully incorporated. Next, gently fold in the whipped heavy cream until no white streaks remain; this will give your cheesecake its signature lightness.
Step 3
Now it’s time to assemble this heavenly dessert! Retrieve your chilled crust from the refrigerator and pour the luscious filling over it. With a spatula, spread the filling evenly across the surface, ensuring it reaches all corners of the crust. Give it a little jiggle to settle any air pockets, making it perfectly smooth.
Step 4
To set the cheesecake, cover it with plastic wrap and place it in the refrigerator for at least 4 hours or until firm. This chilling time is crucial for melding the flavors and achieving the right texture. You can even make it the day before to save time for your gathering.
Step 5
Once the cheesecake has set, prepare the fluffy topping. In a bowl, combine the remaining marshmallow fluff with the whipped heavy cream, folding them together until light and airy. Carefully spread this mixture over the set cheesecake, creating a beautiful, fluffy layer. If you want to add some flair, sprinkle mini marshmallows or crushed graham crackers on top for garnish.
Step 6
As a final touch, return the cheesecake to the refrigerator for another 1-2 hours to let the flavors meld and the topping to firm up slightly. When ready to serve your Fluffy No-Bake Marshmallow Whip Cheesecake Heaven, carefully remove it from the springform pan, slice, and watch your guests’ eyes light up with delight!
Make Ahead Options
These Fluffy No-Bake Marshmallow Whip Cheesake Heaven slices are perfect for meal prep lifers! You can prepare the crust up to 24 hours in advance. Simply combine the graham cracker crumbs, sugar, and melted butter, then press it firmly into your springform pan and refrigerate. The creamy filling can also be mixed and placed directly onto the crust a day ahead—just be sure to cover it tightly with plastic wrap to keep it fresh and prevent any dehydration. When you’re ready to serve, simply add the fluffy topping (made fresh) before chilling for another 1-2 hours. This way, you’ll have a celebrity-worthy dessert that’s just as delicious without any last-minute hassle!
How to Store and Freeze Marshmallow Whip Cheesecake
Fridge: Store uneaten slices of your Marshmallow Whip Cheesecake in an airtight container in the refrigerator for up to 3 days to keep it fresh and creamy.
Freezer: For longer storage, wrap the cheesecake tightly in plastic wrap and then in aluminum foil; it can be kept in the freezer for up to 2 months. Thaw in the fridge overnight before serving.
Reheating: While this no-bake cheesecake is best enjoyed chilled, if you’ve prepared a warm topping, carefully heat it separately before serving to maintain the delightful contrast of textures.
Serving Tips: Always garnish with mini marshmallows or crushed graham crackers just before serving for an irresistible finishing touch!
What to Serve with Marshmallow Whip Cheesecake Heaven?
Picture a perfect ending to your dessert feast; this fluffy cheesecake can easily be complemented by a variety of sides to round out your spread.
-
Fresh Berries: The tanginess of strawberries, blueberries, or raspberries provides a refreshing contrast to the rich cheesecake. Their vibrant colors will enhance the plate and bring a delightful burst of flavor.
-
Chocolate Sauce: Drizzle warm chocolate sauce over each slice for an indulgent touch. The creamy, rich chocolate pairs beautifully with the light, fluffy cheesecake.
-
Mint-Infused Whipped Cream: Adding a touch of fresh mint to your whipped cream elevates the cheesecake experience. The cool herbal notes will brighten and balance the sweetness of the dessert.
-
Coconut Flake Topping: Sprinkling toasted coconut flakes on top introduces a tropical flair. The chewy texture of coconut adds an exciting layer of complexity to the overall dessert.
-
Lemon Zest Garnish: A sprinkle of fresh lemon zest can add a zesty twist that cuts through the sweetness. This uplifting flavor can bring a refreshing zing to the creamy cheesecake.
-
Iced Tea or Lemonade: Serve a chilled glass of homemade iced tea or lemonade alongside the cheesecake. Their refreshing qualities will cleanse the palate and enhance the overall dining experience.
-
Chocolate-Covered Strawberries: For an elegant touch, consider serving chocolate-covered strawberries. Their richness and sweetness complement the creamy cheesecake perfectly, creating a decadent treat.
-
Coffee or Espresso: Pair your cheesecake with a warm cup of coffee or espresso. The deep, roasted flavors offer a delightful contrast and can enhance the marshmallow notes in the dessert.
These delightful pairings will ensure that your Marshmallow Whip Cheesecake Heaven shines even brighter at your next gathering!
Expert Tips for Marshmallow Whip Cheesecake Heaven
- Cream Cheese Prep: Ensure your cream cheese is fully softened at room temperature for a smooth and creamy filling. Cold cream cheese can lead to lumps.
- Chill Time is Key: Don’t rush the chilling process! Allow the cheesecake to set for at least 4 hours. This ensures the flavors develop and the texture is perfect.
- Gluten-Free Options: If you're serving guests with dietary restrictions, swap in gluten-free graham crackers without sacrificing flavor or texture.
- Airy Topping: When folding in the whipped cream for the filling and topping, do it gently to retain the airy texture that makes this cheesecake heavenly.
- Beautiful Garnish: Consider adding mini marshmallows or crushed graham crackers just before serving for an eye-catching presentation and added sweetness.
- Make Ahead: This delicious Marshmallow Whip Cheesecake can be made up to 2 days in advance, making it a stress-free option for entertaining!
Marshmallow Whip Cheesecake Variations
Feel free to explore your creativity with these delightful options that will bring a fresh twist to your cheesecake!
-
Crust Swap: Use an Oreo crust or shortbread crust for a deliciously different flavor profile. Imagine the delightful chocolate contrast to your fluffy filling!
-
Gluten-Free: Opt for gluten-free graham crackers to keep everyone happy without sacrificing taste. Your gluten-free friends won’t even notice the difference!
-
Whipped Topping Substitute: In a pinch, you can use store-bought whipped topping instead of homemade whipped cream. It’s quick and still delicious!
-
Flavor Infusion: Add a teaspoon of orange or lemon zest to the filling for a citrus burst. This tangy twist will elevate your cheesecake experience!
-
Chocolate Lovers: Fold in mini chocolate chips or use a chocolate ganache drizzle on top. Your guests will be in chocolate heaven!
-
Fruit Toppings: Top your cheesecake with fresh berries or a fruity compote. The sweetness of fruit creates a lovely contrast to the creamy dessert.
-
Nutty Crunch: Add crushed nuts like pecans or walnuts to the crust or sprinkle on top for an irresistible crunchy texture. It’s a wonderful surprise in each slice!
-
Spicy Heat: For a kick, mix in a pinch of cinnamon or cayenne pepper to the crust. This unexpected spice will have everyone guessing!
Embrace these variations, and watch how your cheesecake transforms into a personal and exciting creation!
Marshmallow Whip Cheesecake Heaven Recipe FAQs
Can I use heavy whipping cream for cheesecake?
Absolutely! Heavy whipping cream is perfect for creating a light and fluffy texture in your Marshmallow Whip Cheesecake. Make sure to whip it until stiff peaks form, which usually takes about 3-5 minutes with an electric mixer. This will ensure your cheesecake filling is airy and delightful!
How to know when cheesecake is whipped enough?
You’ll know your cheesecake filling is whipped enough when it’s smooth and creamy with no lumps. If you’re watching your cream cheese, aim for a consistency that holds a soft peak when you lift your whisk or mixer attachment out of the mixture, which typically takes about 2-3 minutes of mixing.
Do you use Cool Whip for cheesecake?
While Cool Whip can be used as a substitute for the whipped heavy cream in your cheesecake, I highly recommend using fresh heavy cream for that optimal fluffy texture. It makes a noticeable difference in flavor and creaminess, giving you a homemade taste that store-bought options just can’t match!
Can you freeze marshmallow cheesecake?
Yes, you can freeze your Marshmallow Whip Cheesecake! To do so, first, wrap it tightly in plastic wrap and then in aluminum foil to prevent freezer burn. This cheesecake can be stored in the freezer for up to 2 months. When you’re ready to enjoy it, simply thaw it in the refrigerator overnight before serving.
Why do people put heavy cream in cheesecake?
Heavy cream adds an essential lightness to the cheesecake filling. It helps create a creamy and airy texture, perfectly balancing the richness of the cream cheese. The whipped cream incorporates air, making each slice feel indulgent without being overly heavy.
What is the best base for cheesecake?
The classic graham cracker crust is a beloved choice for many cheesecakes, but feel free to explore other options! An Oreo crust brings a delightful chocolatey twist, while shortbread crusts offer a buttery flavor. You can even make it gluten-free by using gluten-free cracker options without sacrificing taste.
Irresistibly Creamy Marshmallow Whip Cheesecake Heaven
Ingredients
Method
- Prepare the crust by combining graham cracker crumbs, granulated sugar, and melted butter in a mixing bowl. Press into a 9-inch springform pan and chill for 30 minutes.
- Beat softened cream cheese and powdered sugar until smooth, then mix in vanilla extract and marshmallow fluff. Fold in whipped cream until smooth.
- Pour filling over the crust, spreading evenly and jiggling to settle.
- Cover and chill in the refrigerator for at least 4 hours until firm.
- Prepare topping by folding remaining marshmallow fluff and whipped cream together, then spread over the cheesecake and garnish.
- Chill for an additional 1-2 hours before serving. Slice and enjoy!
Nutrition
Notes
- Ensure cream cheese is at room temperature for a smooth filling.
- Chill for at least 4 hours to develop flavors.
- For gluten-free, use gluten-free graham crackers.
- Fold whipped cream gently to keep it airy.
- Garnish right before serving for a stunning presentation.
- Can be made up to 2 days in advance.