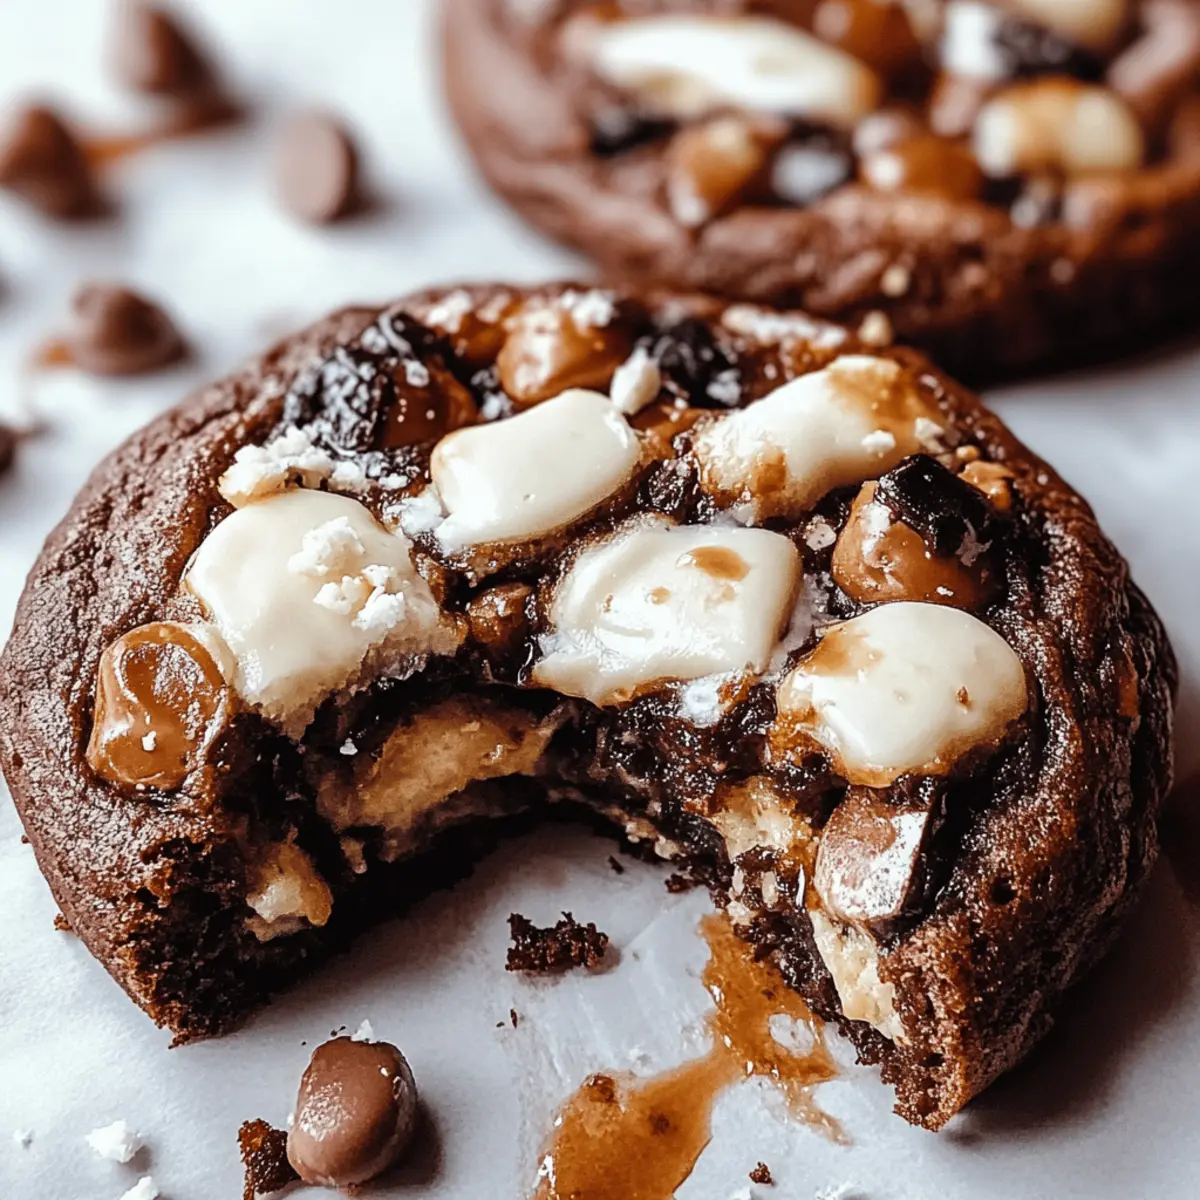
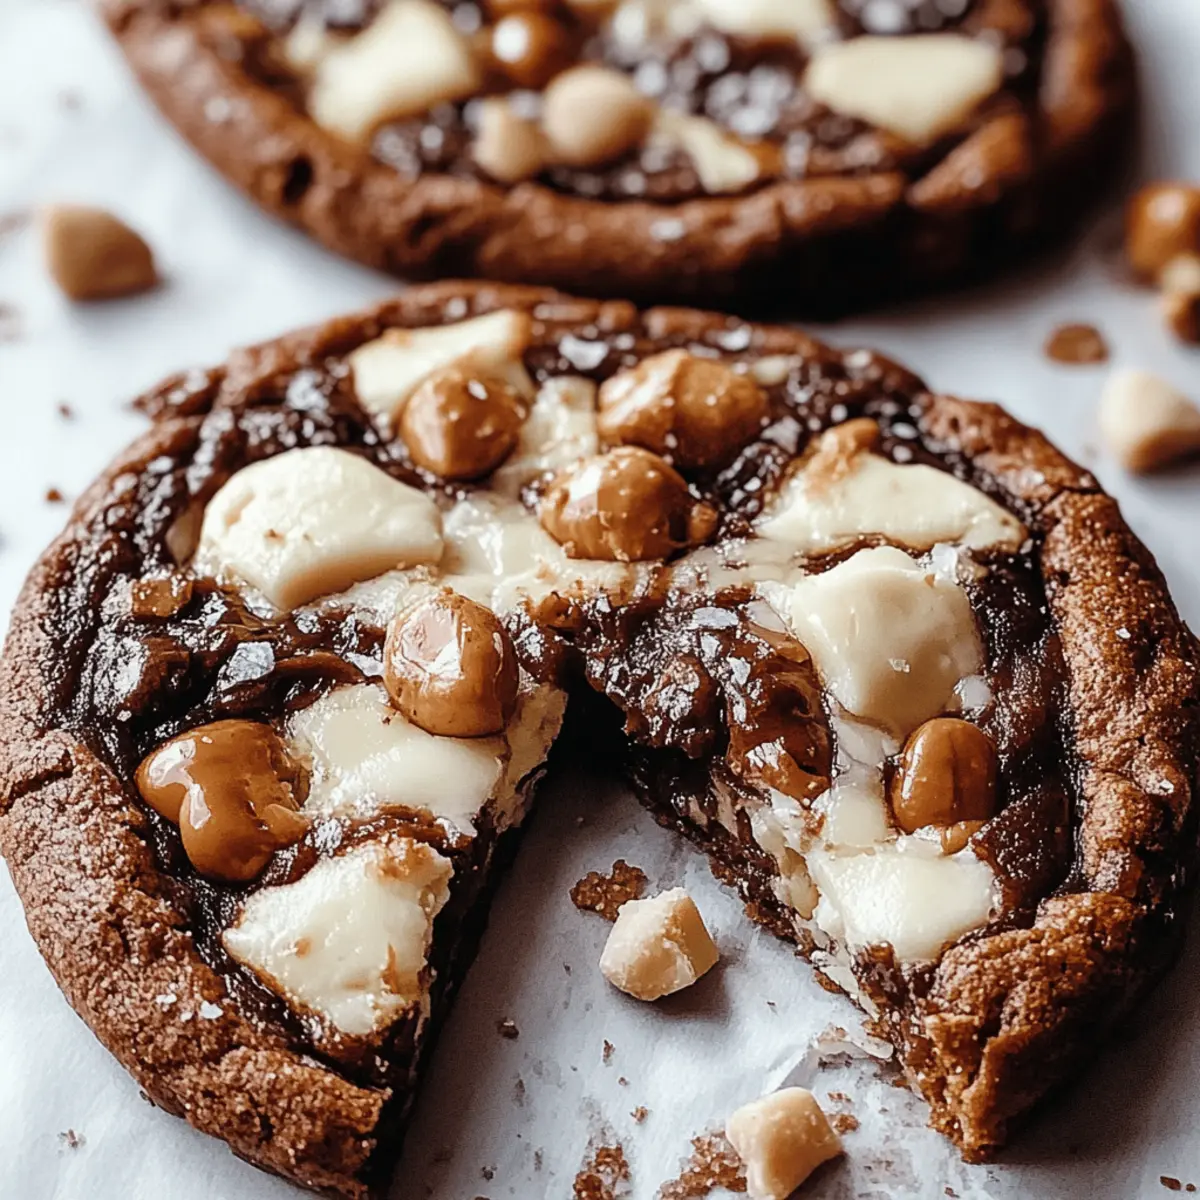
The sound of laughter filled the kitchen as my friends and I gathered around a towering platter of fresh-baked Rocky Road Cookies, their gooey chocolate chips and crunchy nuts beckoning us closer. This recipe is more than just a satisfying sweet treat; it’s a delightful escape into a world of nostalgia where every bite feels like a hug. With their quick prep time and the ability to easily customize with your favorite mix-ins, these cookies are perfect for both spontaneous gatherings and cozy nights at home. Plus, they’re a guaranteed crowd-pleaser that will impress your guests, all while making you the star of the kitchen! Are you ready to create a cookie that not only satisfies your sweet tooth but also sparks joy in every shared moment? Let’s dive in!
Why Are Rocky Road Cookies Truly Irresistible?
Decadent flavors come together in these cookies, featuring delightful chunks of chocolate, nuts, and marshmallows. Quick preparation makes them a breeze to whip up, perfect for impromptu gatherings. Customizable and versatile, you can add your favorite mix-ins, making each batch unique. Family-friendly fun allows everyone to pitch in, creating memories while baking. Finally, unforgettable crowd-pleasers that disappear in minutes will have everyone asking for the recipe!
Rocky Road Cookies Ingredients
• Ready to make your kitchen come alive with the delightful taste of Rocky Road Cookies? Here’s everything you need!
For the Cookie Dough
- Cold Butter – helps create a rich, tender texture in the cookies.
- Brown Sugar – adds a deep, molasses-like flavor that enhances the sweetness.
- Granulated Sugar – balances the flavors and helps with that delightful crispiness.
- Large Eggs – provide moisture and act as a binding agent, crucial for structure.
- Vanilla Extract – infuses a warm, inviting aroma that elevates the overall flavor.
- Unsweetened Cocoa Powder – gives these cookies a rich chocolatey base; don't skip it for that true Rocky Road essence!
- Cake Flour – adds tenderness; feel free to substitute with all-purpose flour if needed.
- All-Purpose Flour – offers structure to your cookies while keeping them soft in the center.
- Cornstarch – ensures a chewy texture, adding softness that melts in your mouth.
- Baking Soda – helps cookies rise and develop that perfect texture.
- Salt – balances sweetness and enhances the flavors in every bite.
For the Mix-Ins
- Semi-Sweet Chocolate Chips – ensure gooey pockets of chocolate goodness in every cookie.
- Mini Marshmallows – bring that classic Rocky Road vibe and a fun chewy texture.
- Cashews – add crunchiness; feel free to use any nut you prefer for a personal touch!
Step‑by‑Step Instructions for Rocky Road Cookies
Step 1: Preheat the Oven
Begin by preheating your oven to 410°F (210°C). This higher temperature will ensure that your Rocky Road Cookies develop a deliciously crispy edge while keeping the centers irresistibly soft. While the oven warms up, gather all your ingredients and equipment, including a mixing bowl, spatula, and parchment paper for the baking sheet.
Step 2: Cream the Butter and Sugars
In a large mixing bowl, cream together 1 cup of cold butter, 1 cup of brown sugar, and 1 cup of granulated sugar. Use an electric mixer at medium speed for about 4 minutes until the mixture becomes light and fluffy. This step is essential to incorporate air, ensuring your cookies will be tender and delightful.
Step 3: Add Eggs and Vanilla
Next, incorporate 2 large eggs and 2 teaspoons of vanilla extract into the creamy mixture. Beat them together for an additional minute, ensuring everything is well combined. You’ll notice a rich aroma in the air as the eggs and vanilla infuse your batter with flavor, enhancing the Rocky Road experience.
Step 4: Combine the Dry Ingredients
Gradually fold in the unsweetened cocoa powder, cake flour, all-purpose flour, cornstarch, baking soda, and salt until just combined. Aim for a smooth yet slightly lumpy texture—overmixing will lead to tough cookies. This mixture will form a thick, rich chocolate dough that is the foundation of your Rocky Road Cookies.
Step 5: Mix in Chocolate Chips and Nuts
Gently stir in 1 cup of semi-sweet chocolate chips, 1 cup of mini marshmallows, and 1 cup of chopped cashews. This is where the cookie magic happens! Each mix-in will add texture and sweetness, creating that classic Rocky Road flavor. Ensure everything is evenly distributed throughout the dough.
Step 6: Shape the Cookie Dough
Roll the cookie dough into 5 to 6-ounce balls, using your hands to achieve a uniform shape. Place each ball on a parchment-lined baking sheet, ensuring there’s ample space between them to allow for spreading during baking. This helps each cookie develop that delightful crispy exterior while remaining soft inside.
Step 7: Add Toppings
Before baking, press a few extra chocolate chips and mini marshmallows on top of each dough ball. This extra touch not only makes for a beautiful presentation but enhances the gooeyness in each bite. You’ll love how appealing your Rocky Road Cookies look before they even enter the oven!
Step 8: Bake the Cookies
Place the baking sheet in the preheated oven and bake for 9-11 minutes. Keep an eye on them; the edges should be set, while the centers remain soft and slightly underbaked for that chewy texture. You’ll know they’re ready when they start to puff up and look irresistible.
Step 9: Cool and Enjoy
Once baked, remove the cookies from the oven and allow them to rest on the baking sheet for 15 minutes. This time lets them firm up just enough before they are transferred to a wire rack to cool completely. Your Rocky Road Cookies are now ready to be shared and enjoyed with family and friends!
Rocky Road Cookies Variations
Feel free to swap ingredients and make these cookies your own, bringing new dimensions to their delightful goodness!
- Gluten-Free: Substitute all-purpose flour with a 1:1 gluten-free flour blend to cater to gluten sensitivities.
- Nut-Free: Replace cashews with sunflower seeds or omit nuts entirely for a crunchy twist without the allergy risk. Enjoy the delightful flavors without worry!
- Vegan: Use vegan butter and flax eggs for an egg-free cookie that everyone can enjoy. The same chewy texture awaits!
- Spicy Kick: Add a dash of cayenne pepper or chili powder for a surprising heat that contrasts beautifully with the sweetness. Just a little does the trick!
- Different Chocolate: Experiment with dark chocolate chips or white chocolate for a unique flavor profile that tantalizes the taste buds. Each variation offers something new to discover.
- Extra Crunch: Toss in some crushed pretzels for added salty crunch that enhances the cookie experience with exciting textures. The sweet and salty combination is simply irresistible!
- Fruit Fusion: Incorporate dried cherries or cranberries for a fruity zest that brightens up each bite of chocolatey goodness. This addition brings freshness and a pop of color!
- Peanut Butter Version: Mix in peanut butter chips for a classic flavor pairing that creates a decadent twist on your Rocky Road adventure. Your taste buds will thank you for this delight!
Expert Tips for Rocky Road Cookies
• Room Temperature Butter: Ensure the butter is cold but not too hard; if it's too soft, the cookies will spread too much.
• Mixing Method: Avoid overmixing the dough once the flour is added to keep your Rocky Road Cookies tender and chewy.
• Topping Treats: Pressing extra chocolate chips and marshmallows on top before baking gives a beautiful finish and enhances that gooey texture.
• Watch the Bake Time: Oven temperatures can vary; check your cookies at 9 minutes to avoid overbaking and maintain that soft center.
• Cooling Time: Allow cookies to cool on the baking sheet before transferring them; this step is crucial for achieving the perfect chewy texture.
What to Serve with Rocky Road Cookies
Imagine a cozy afternoon, where the aroma of freshly baked cookies fills your home, mingling with laughter and love from family and friends.
-
Cold Glass of Milk: A classic pairing, milk enhances the rich flavors and helps balance the sweetness of the cookies.
-
Vanilla Ice Cream: The creamy, cool texture complements the warm, gooey cookies perfectly, turning them into an indulgent dessert experience.
-
Hot Fudge Sauce: Drizzle this decadent sauce over your cookies for an extra chocolatey treat that’s sure to satisfy any sweet tooth.
-
Fresh Fruit Salad: A refreshing burst of juicy fruits contrasts the rich, sweet flavors of the cookies, adding balance to your dessert table.
-
Espresso or Coffee: The boldness of coffee pairs well with the sweetness, providing a flavorful kick that brings out the cocoa notes in each cookie.
-
Chocolate Dipped Strawberries: These elegant treats make for a romantic touch, with the combination of fresh strawberries and chocolate enhancing the overall dessert experience.
-
Mint Choc Chip Shake: This cool and refreshing drink can lighten the richness of the cookies while keeping that chocolatey flavor alive.
-
Nutty Trail Mix: Add some crunch with a side of nutty trail mix! It's a fun and healthful contrast to the softness of Rocky Road Cookies.
How to Store and Freeze Rocky Road Cookies
Room Temperature: Store cooled cookies in an airtight container for up to 3 days to maintain freshness and prevent them from drying out.
Fridge: For longer storage, keep the cookies in the fridge, where they can last up to a week. Just be sure to use a sealed container to keep them from absorbing other odors.
Freezer: Freeze Rocky Road Cookies for up to 3 months. Place them in a single layer on a baking sheet, freeze until solid, then transfer to a resealable bag or airtight container.
Reheating: To enjoy leftover cookies, reheat in the microwave for 10-15 seconds until warmed through, bringing back that gooey center you love!
Make Ahead Options
These Rocky Road Cookies are a fantastic option for meal prep, allowing you to save time during your busy week! You can prepare the cookie dough and refrigerate it for up to 24 hours before baking, ensuring the flavors meld beautifully. Simply roll the dough into balls and place them in an airtight container; just make sure to separate the layers with parchment paper to prevent sticking. When you're ready to bake, there’s no need to thaw—simply place the dough balls directly on the baking sheet and add an extra minute or two to the baking time for perfectly chewy cookies. With these make ahead tips, you’ll enjoy fresh, homemade cookies with minimal effort.
Rocky Road Cookies Recipe FAQs
What is the best way to select ripe and fresh ingredients for Rocky Road Cookies?
Absolutely! When selecting your ingredients, make sure the butter is cold but not too hard; this helps achieve the perfect cookie texture. For eggs, choose large, fresh ones—check the expiration date. For your nuts, like cashews, look for ones that are intact and have no dark spots or signs of rancidity. When picking marshmallows, make sure they're soft and fluffy, which ensures that delicious gooey texture in your cookies!
How should I store my leftover Rocky Road Cookies?
For short-term storage, keep your cooled cookies in an airtight container at room temperature for up to 3 days. This will keep them fresh and chewy! If you’d like to store them longer, place them in the fridge in a sealed container, where they'll be fine for about a week. Just remember to let them return to room temperature before enjoying again.
Can I freeze Rocky Road Cookies, and if so, how?
Of course! You can freeze your Rocky Road Cookies for up to 3 months. Start by placing them in a single layer on a baking sheet and freezing them until solid. Once they're firm, transfer the cookies into a resealable bag or airtight container, layering parchment paper between them to prevent sticking. When you're ready to enjoy, simply remove them from the freezer and let them thaw at room temperature or reheat them in the microwave for that warm, gooey goodness!
What should I do if my cookies come out too hard or dry?
Very often, dry cookies result from overmixing the dough or baking them for too long. If this happens, next time try mixing until just combined after adding the flour, and keep an eye on the baking time—check at around 9 minutes. If your cookies are already baked, you can try softening them by placing a slice of bread in the container with them overnight; this helps to reintroduce moisture back into your cookies.
Are Rocky Road Cookies safe for people with nut allergies?
It's essential to be cautious! If you're making Rocky Road Cookies for someone with a nut allergy, simply substitute the cashews with a nut-free alternative like sunflower seeds, or omit them altogether. Additionally, ensure that all other ingredients, like chocolate chips and marshmallows, are free from cross-contamination with nuts. Always check labels for allergen information to keep everyone safe!
Rocky Road Cookies
Ingredients
Equipment
Method
- Preheat your oven to 410°F (210°C). Gather all ingredients and equipment.
- In a large bowl, cream together cold butter, brown sugar, and granulated sugar with an electric mixer at medium speed for about 4 minutes.
- Add eggs and vanilla extract, beating for an additional minute until well combined.
- Gradually fold in cocoa powder, cake flour, all-purpose flour, cornstarch, baking soda, and salt until just combined.
- Gently stir in chocolate chips, mini marshmallows, and chopped cashews until evenly distributed.
- Roll dough into 5 to 6-ounce balls and place on a parchment-lined baking sheet.
- Press extra chocolate chips and marshmallows onto each dough ball.
- Bake for 9-11 minutes until edges are set and centers remain soft.
- Remove from oven and allow to cool on the baking sheet for 15 minutes before transferring to a wire rack.