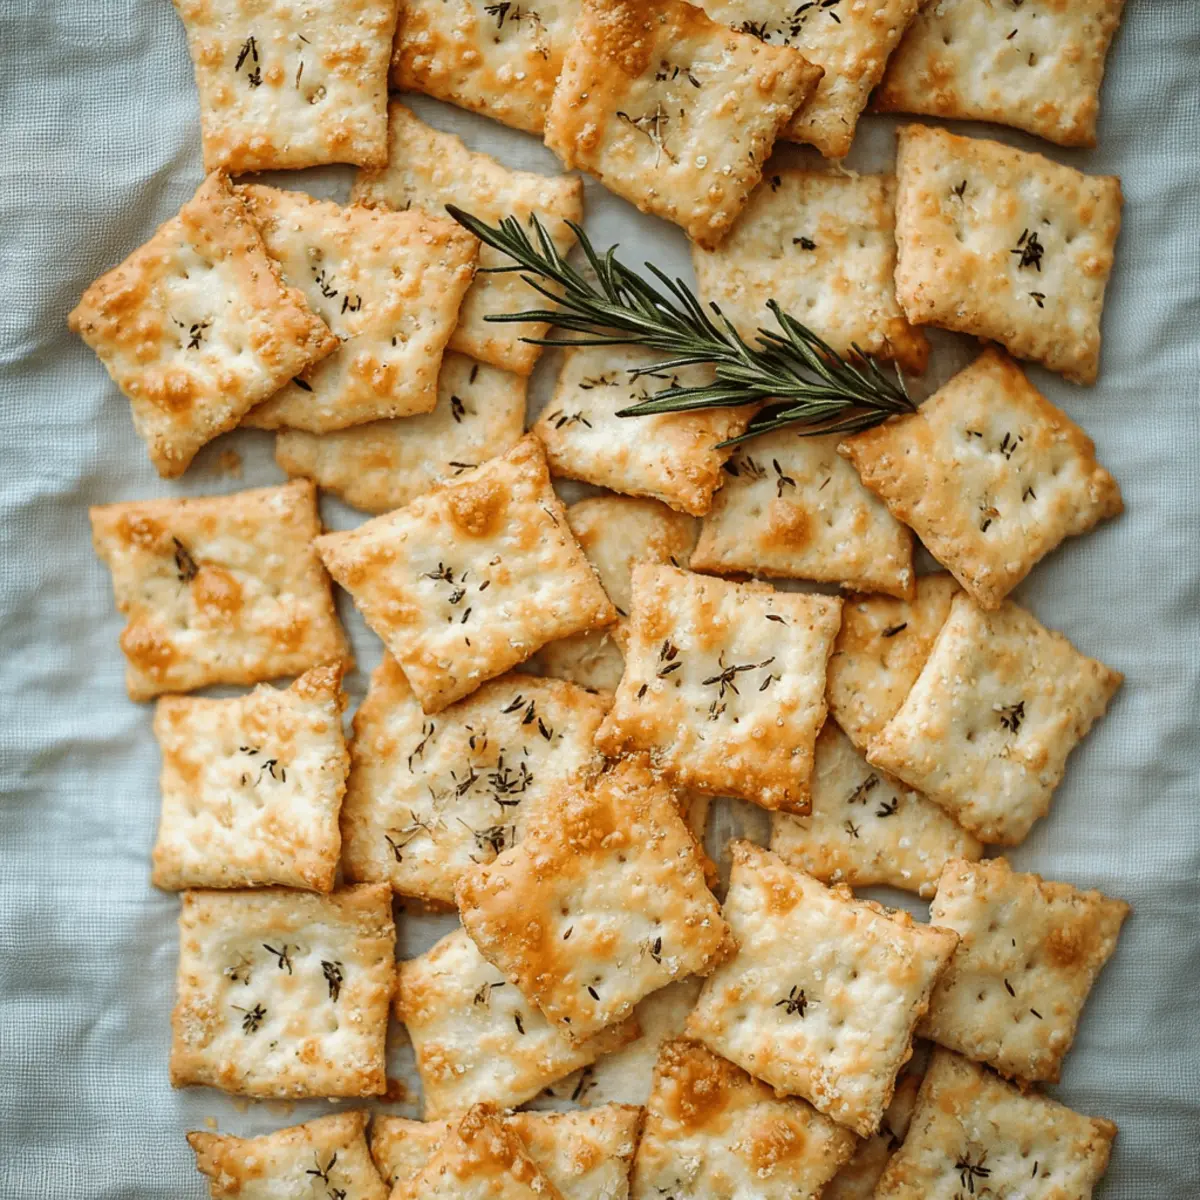
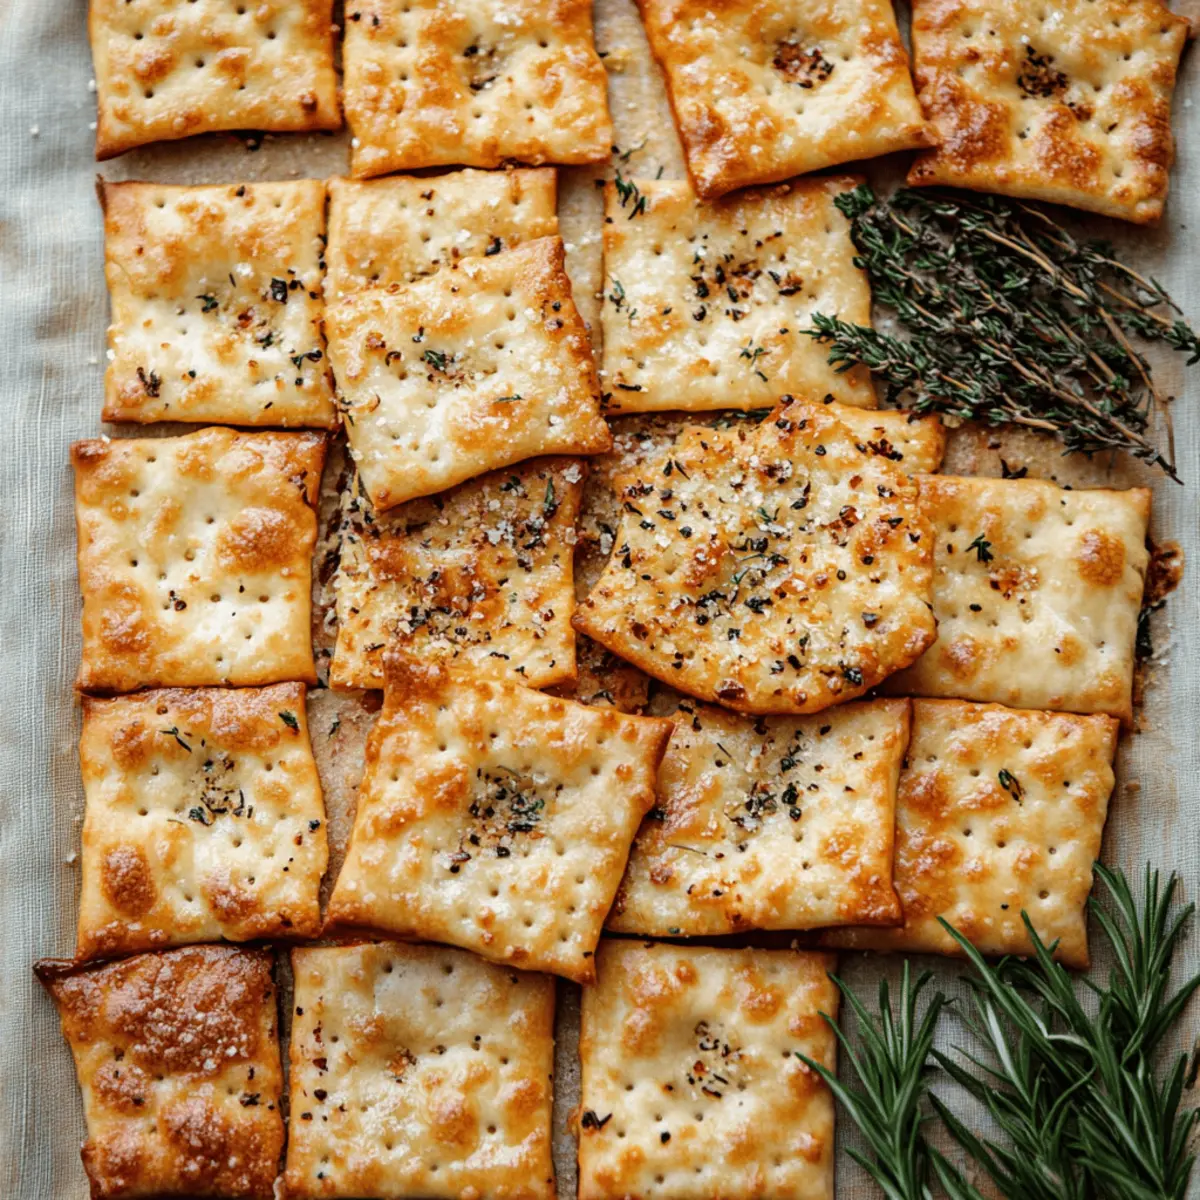
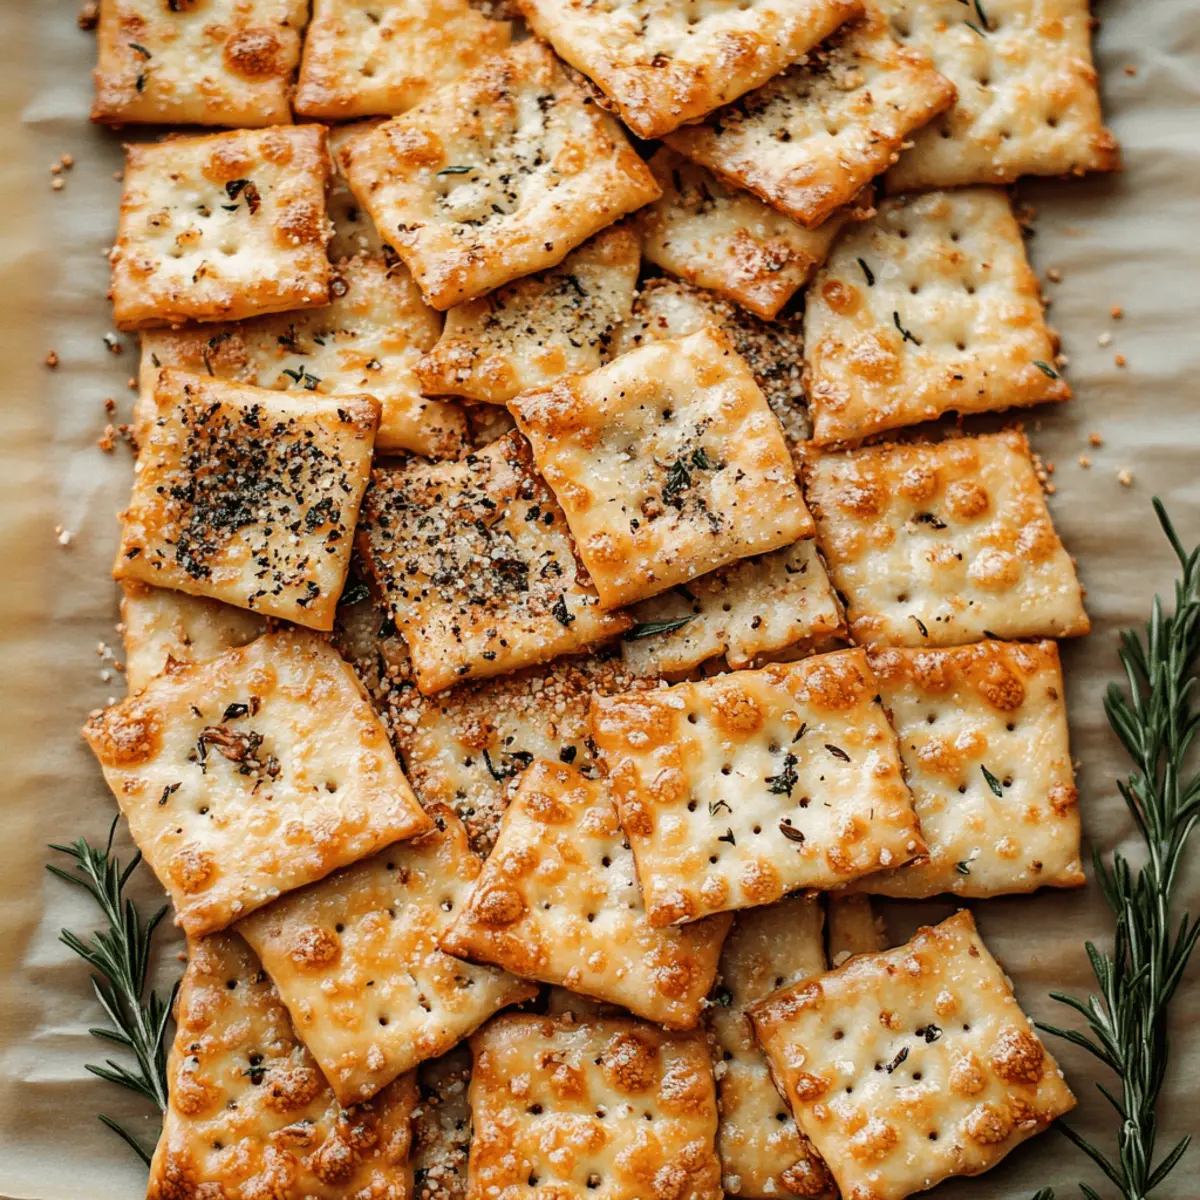
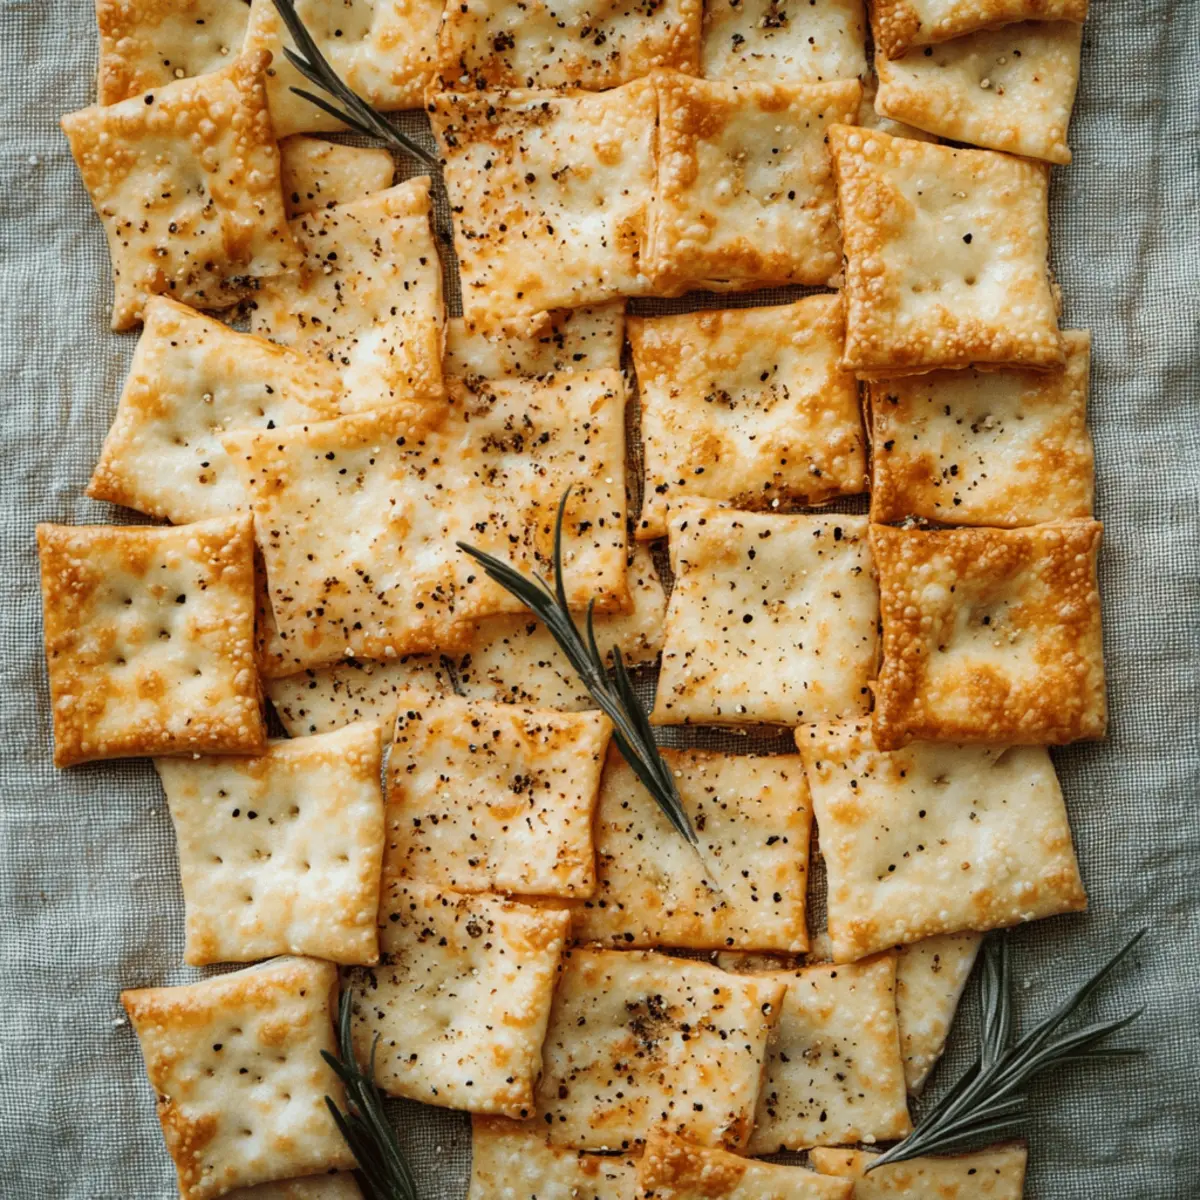
Who knew that transforming a few simple ingredients could lead to a delightful homemade snack that outshines anything from the store? These Homemade Artisan Crackers are a game-changer in your kitchen arsenal, providing a customizable crunchy alternative that can be tailored to suit virtually any palate. With just a handful of components, you can whip up not only a delicious treat but also a healthy option for gatherings—perfect for impressing friends or just enjoying solo. Whether you lean toward herbaceous rosemary, nutty sesame seeds, or the bold flavors of everything bagel seasoning, this recipe lets you experiment to your heart's content. Ready to discover how baking your own artisan crackers can elevate your snacking experience? Let’s dive into this fun, creative journey!
Why Make Your Own Artisan Crackers?
Simplicity at its finest: With just a few pantry staples, you can create these delightful snacks in no time!
Customizable flavors: Choose from savory rosemary, nutty sesame, bold everything bagel, or fresh chives, making every batch uniquely yours.
Crispy perfection: Each cracker has the ideal crunch, perfect for pairing with cheese, spreads, or simply enjoying on their own.
Healthy alternative: Say goodbye to preservatives and unhealthy snacks, and embrace a wholesome treat you can feel good about.
Perfect for gatherings: Impress your guests with a homemade snack that’s sure to be a hit—ideal for cheese boards or parties!
Artisan Crackers Ingredients
For the Dough
- All-purpose flour – This forms the base, offering structure for the crackers.
- Salt – Enhances the flavor of the crackers; don’t skip it!
- Baking powder – Helps create a lighter texture, making your crackers crispy.
For the Flavorings
- Dried herbs (e.g., rosemary, sesame seeds, everything bagel seasoning, chives) – Customize your artisan crackers with your favorite flavors for a unique twist each time.
For the Wet Ingredients
- Water – Provides the necessary moisture to bind everything together; use room temperature for best results.
- Olive oil – Adds richness and helps achieve that lovely crispy texture.
For the Topping
- Flaky sea salt – Sprinkled on top for a delightful finishing touch that enhances every bite.
Step‑by‑Step Instructions for Homemade Artisan Crackers
Step 1: Whisk Together Dry Ingredients
In a large mixing bowl, whisk together 2 cups of all-purpose flour, 1 teaspoon of salt, 1 teaspoon of baking powder, and your choice of 1 tablespoon dried herbs or seeds. This creates a flavorful base for your artisan crackers. Once combined, prepare your workspace by ensuring you have a floured counter ready for the dough.
Step 2: Combine Wet Ingredients
Pour in ¾ cup of room temperature water and ¼ cup of olive oil into the dry mixture. Stir with a wooden spoon or silicone spatula until a slightly sticky dough forms. Make sure all the flour is incorporated; the mixture should look cohesive and somewhat tacky but not overly wet.
Step 3: Knead the Dough
Transfer the dough onto the floured countertop and knead it lightly for 1 to 2 minutes until it becomes a smooth ball. If the dough sticks to your hands, sprinkle a touch more flour as needed. The goal is a soft and manageable dough, ready for resting.
Step 4: Let Dough Rest
Cover the kneaded dough with a clean kitchen towel or plastic wrap and let it rest for at least 10 minutes. This resting period allows the gluten to relax, making the dough easier to roll out. You’ll notice it becomes a bit firmer yet still pliable.
Step 5: Divide the Dough
Once rested, cut the dough in half, keeping one half covered to prevent it from drying out. This will allow you to work with just one piece at a time, ensuring a smooth rolling process to create your artisan crackers.
Step 6: Roll Out the Dough
On a floured surface, roll out the first half of the dough as thin as possible, aiming for about 1/16-inch thickness. If you notice the dough springing back, allow it to rest for an additional 5 minutes before continuing. This ensures the dough is easy to work with and results in crispy crackers.
Step 7: Cut the Crackers
Using a pizza cutter, cut the rolled-out dough into rectangles, approximately 3 x 1.5 inches. This easy cutting method allows you to create uniformly sized artisan crackers that will bake evenly and look beautiful on your serving platter.
Step 8: Transfer to Baking Sheet
Carefully transfer the cut crackers to a parchment-lined baking sheet, making sure they are placed about 1 inch apart for even baking. The parchment will prevent sticking and promote a nice, crispy bottom.
Step 9: Dock the Crackers
Using a fork, dock each cracker several times to prevent bubbling during baking. This technique ensures that your homemade artisan crackers will maintain their shape and achieve that desired crispiness all around.
Step 10: Season the Crackers
Brush olive oil over the tops of the docked crackers and sprinkle generously with flaky sea salt, along with any additional seasonings of your choice. This step adds flavor and texture, making each bite absolutely irresistible.
Step 11: Bake the Crackers
Preheat your oven to 425°F (218°C) and bake the crackers for 9 to 12 minutes until they are golden brown and crisp. Keep an eye on them towards the end of the cooking time; they can quickly go from perfect to overdone.
Step 12: Cool and Crisp
Once baked, allow the artisan crackers to cool on the baking sheet for a few minutes. They will continue to crisp up as they cool. For the best texture, avoid stacking them until they are completely cool.
Step 13: Repeat with Remaining Dough
Follow the same rolling, cutting, and baking steps with the remaining half of the dough. You can mix up the flavors with different herbs or seeds to create a variety of artisan crackers, perfect for any occasion!
Expert Tips for Artisan Crackers
-
Perfect Thickness: Aim for about 1/16-inch thickness when rolling out your dough. Thinner crackers bake more evenly and achieve that delightful crunch!
-
Prevent Shrinkage: If the dough springs back while rolling, let it rest for 5 minutes. This relaxes the gluten, allowing for easier shaping and crispier artisan crackers.
-
Docking Technique: Don’t skip the fork docking! This simple step prevents bubbling and ensures even cooking, resulting in perfectly flat and crispy crackers.
-
Season Generously: Brush with olive oil and sprinkle with flaky sea salt before baking. Customize with extra herbs or spices for a flavor bomb that enhances your artisan crackers!
-
Storage Tips: Once cooled, store the crackers in an airtight container to maintain their crispiness. Lasts up to a week, but they're so delicious, they'll likely be gone before then!
Make Ahead Options
These Homemade Artisan Crackers are perfect for meal prep enthusiasts! You can prepare the dough up to 24 hours in advance; simply wrap it tightly in plastic wrap and refrigerate to maintain moisture and prevent drying out. When you're ready to bake, roll out the dough and proceed with cutting and baking as directed. Additionally, you can also cut the crackers and dock them a day ahead—just store them on the baking sheet covered with a kitchen towel in the fridge until you're ready to bake. This prep will help you enjoy delicious, crispy artisan crackers with minimal effort when you need them most, making snack time a breeze!
Artisan Crackers Customization Ideas
Ready to get creative with your cracker-making? Here's how you can go beyond the basics and make these snacks even more delightful!
- Dairy-Free: Swap olive oil for avocado oil or melted coconut oil for a dairy-free alternative that keeps the texture light.
- Whole Wheat: Use whole wheat flour instead of all-purpose flour for a nutty flavor and extra fiber.
- Cheesy Touch: Add ¼ cup grated Parmesan cheese to the dough for a savory, cheesy cracker that’s irresistibly good.
- Spicy Kick: Mix in 1 teaspoon of red pepper flakes or cayenne pepper for a warm, spicy flair that dances on your palate.
- Nutty Flavor: Incorporate ¼ cup finely chopped nuts like almond or walnuts for an extra crunch and a unique twist.
Experimenting with flavors and textures can elevate your cracker game. Create a festive variety platter with different themes and watch them disappear at the table!
- Herb Blend: Combine a mix of dried herbs like thyme, basil, and oregano for an aromatic flavor burst that’s not just for pizza.
- Sweet Option: Add a tablespoon of honey or maple syrup for a touch of sweetness, perfect for pairing with cream cheese or fruit spreads.
How to Store and Freeze Artisan Crackers
Room Temperature: Keep your homemade artisan crackers in an airtight container at room temperature for up to 1 week. This will help maintain their delightful crispiness.
Fridge: If you live in a humid climate, consider storing them in the fridge. Use an airtight container to prevent moisture absorption and enjoy for up to 2 weeks.
Freezer: For longer storage, freeze the crackers in a single layer on a baking sheet, then transfer to a freezer-safe bag after they’re frozen solid. They can be stored for up to 3 months.
Reheating: To restore crunch, reheat frozen artisan crackers in a preheated oven at 350°F (175°C) for about 5-7 minutes. Enjoy that fresh-out-of-the-oven taste again!
What to Serve with Homemade Artisan Crackers?
Elevate your snacking experience with delightful accompaniments that complement these crispy, savory bites perfectly.
-
Cheese Platter: A selection of creamy brie, sharp cheddar, and tangy goat cheese creates a delightful contrast, inviting you to mix and match flavors.
-
Hummus Trio: Pair with classic, roasted red pepper, and garlic hummus for a flavor explosion that keeps things exciting with every dip!
-
Charcuterie Board: Add slices of prosciutto, salami, and olives for a savory experience. This makes for a beautiful presentation that will impress guests.
-
Fresh Veggies: Serve with vibrant carrot sticks, crunchy cucumber slices, or colorful bell pepper strips for a refreshing crunch that balances the richness of the crackers.
-
Intense Olive Tapenade: A spread of olive tapenade introduces a robust saltiness, enhancing the artisan crackers' natural flavors while adding a unique texture.
-
Sweet Fruit Jam: Offer a side of fig or apricot jam for a sweet contrast that beautifully complements the savory notes of your homemade artisan crackers. A dollop will take your snacking to new heights!
-
Herb-Infused Olive Oil: Create a simple dip using olive oil infused with fresh herbs. It invites your taste buds to dance, providing a delightful richness that's perfect for dunking.
-
Sparkling Wine: Complement the texture of the crackers with a glass of bubbly that enhances every crunchy bite, making your snack time feel extra special.
-
Dark Chocolate: For a sweet finale, pairing these savory snacks with a piece of dark chocolate creates a surprising but wonderful flavor contrast that will leave your taste buds intrigued.
Homemade Artisan Crackers Recipe FAQs
How do I choose the right herbs or seeds for my artisan crackers?
Absolutely! When selecting herbs or seeds, consider your flavor preferences. Fresh rosemary or chives can lend a delightful aroma, while sesame seeds add a nutty crunch. You can even mix different flavors in a single batch! Just use about 1 tablespoon of dried herbs or seeds per batch for balanced flavor.
How should I store my homemade artisan crackers to maintain their crispiness?
I recommend keeping your homemade artisan crackers in an airtight container at room temperature for up to 1 week. This simple method helps to retain their delightful crunch. If you live in a humid climate, consider using an airtight container in the fridge for up to 2 weeks to prevent moisture absorption.
Can I freeze my artisan crackers for later use?
Certainly! To freeze your artisan crackers, first lay them in a single layer on a baking sheet and place them in the freezer until they're completely frozen. Once solid, transfer the crackers to a freezer-safe bag or container. They can be stored this way for up to 3 months and will still taste fantastic when you're ready to enjoy them again.
What should I do if my dough keeps springing back while rolling it out?
Very! If you encounter this issue, simply let the dough rest for an additional 5 minutes. This resting period relaxes the gluten, making it easier to roll out. Keeping the dough covered as you work with each half also prevents it from drying out, resulting in beautifully shaped crackers.
Are there any dietary considerations I should be aware of when making these crackers?
Absolutely! While this recipe uses all-purpose flour, you can easily make it gluten-free by substituting it with a 1:1 gluten-free flour blend. Just ensure any dried herbs or seasonings are also gluten-free. Additionally, feel free to explore different flavor combinations to cater to diverse dietary preferences—even vegan options can be created by swapping the olive oil with another plant-based oil if desired.
What can I serve with my homemade artisan crackers?
The more the merrier! These deliciously crispy snacks pair wonderfully with creamy cheeses, flavorful dips, or spreads like hummus and guacamole. They’re also perfect for adding to a cheese board or simply enjoying as a standalone snack. The options are endless!
Savory Artisan Crackers: Easy to Make and Totally Addictive
Ingredients
Equipment
Method
- Whisk together flour, salt, baking powder, and dried herbs in a large mixing bowl.
- Combine wet ingredients with the dry mixture to form a dough.
- Knead the dough lightly for 1 to 2 minutes until smooth.
- Cover and let the dough rest for at least 10 minutes.
- Divide the dough in half, keeping one piece covered.
- Roll out the dough to about 1/16-inch thickness.
- Cut into rectangles, approximately 3 x 1.5 inches.
- Transfer to a parchment-lined baking sheet, placing them 1 inch apart.
- Dock each cracker several times with a fork to prevent bubbling.
- Brush with olive oil and sprinkle with flaky sea salt.
- Bake at 425°F for 9 to 12 minutes until golden brown.
- Cool on a baking sheet for a few minutes before enjoying.
- Repeat with the remaining half of the dough.