As the leaves turn and the air grows crisp, my kitchen transforms into a playful potion lab, perfect for whipping up seasonal delights. Enter the Halloween Dirt Cups – Graveyard Pudding Dessert with Cookie Crumble, a whimsical treat that brings out the kid in all of us! Not only are these cups a fun and easy way to wow your guests, but they also require just 20 minutes of prep time—leaving you plenty of room for ghostly gatherings and spooky stories. Plus, the layering of creamy chocolate pudding and crunchy cookie crumbs creates a satisfying texture that’s sure to please any palate. Are you ready to dig into some deliciously frightful fun? Let's get started!
Why are Halloween Dirt Cups so fun?
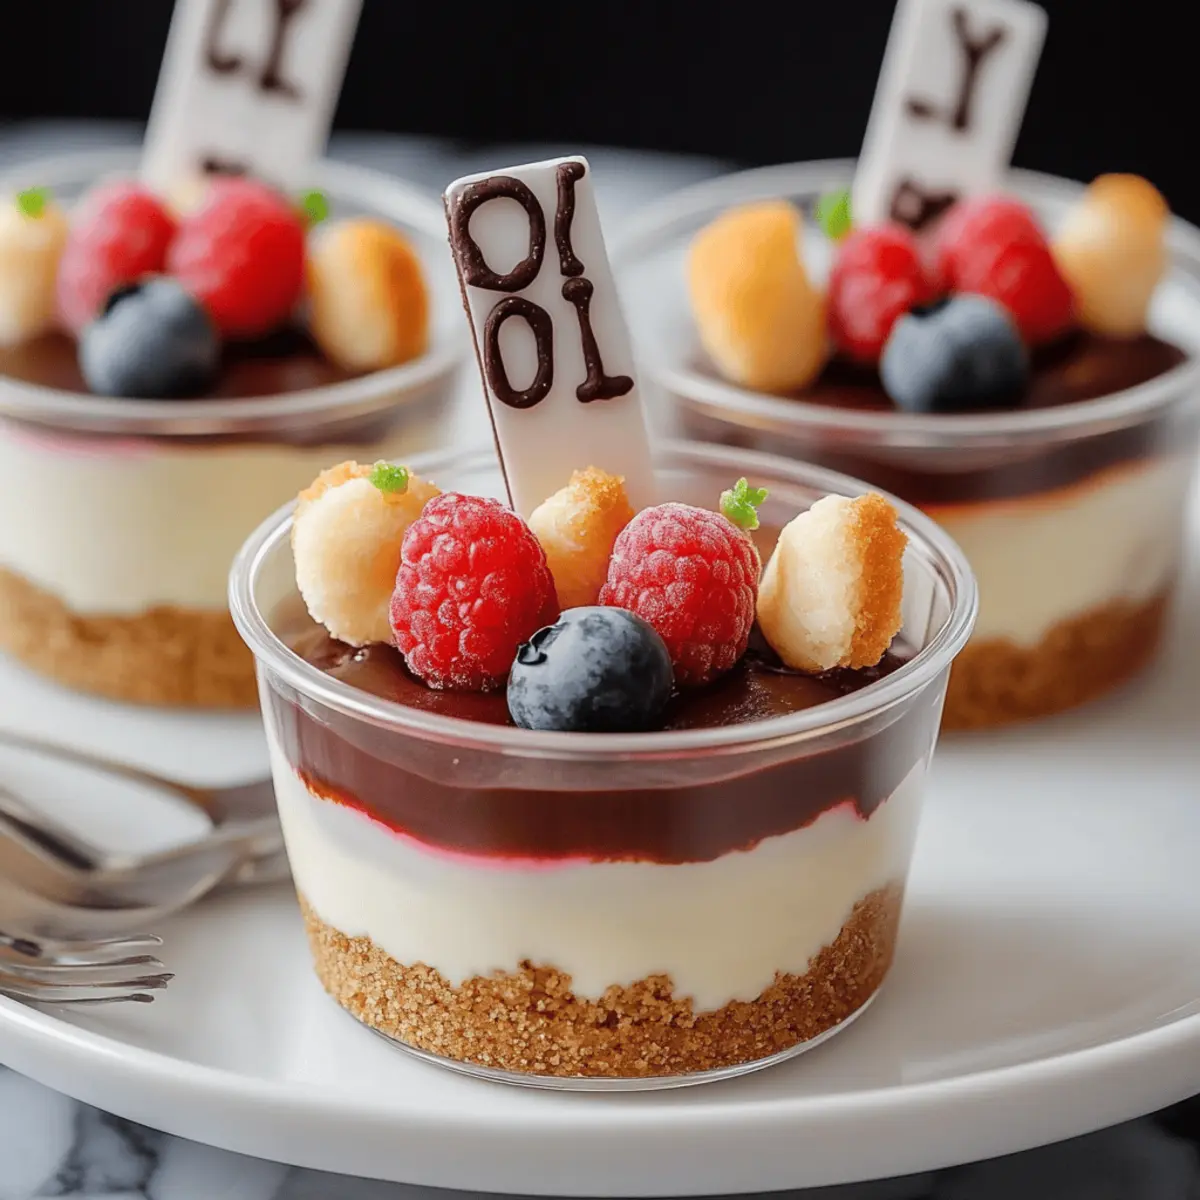
Creative presentation: These adorable cups turn ordinary pudding into a spooktacular showstopper, perfect for any Halloween gathering!
Quick prep time: With only 20 minutes to whip them up, you'll have more time to enjoy your festivities.
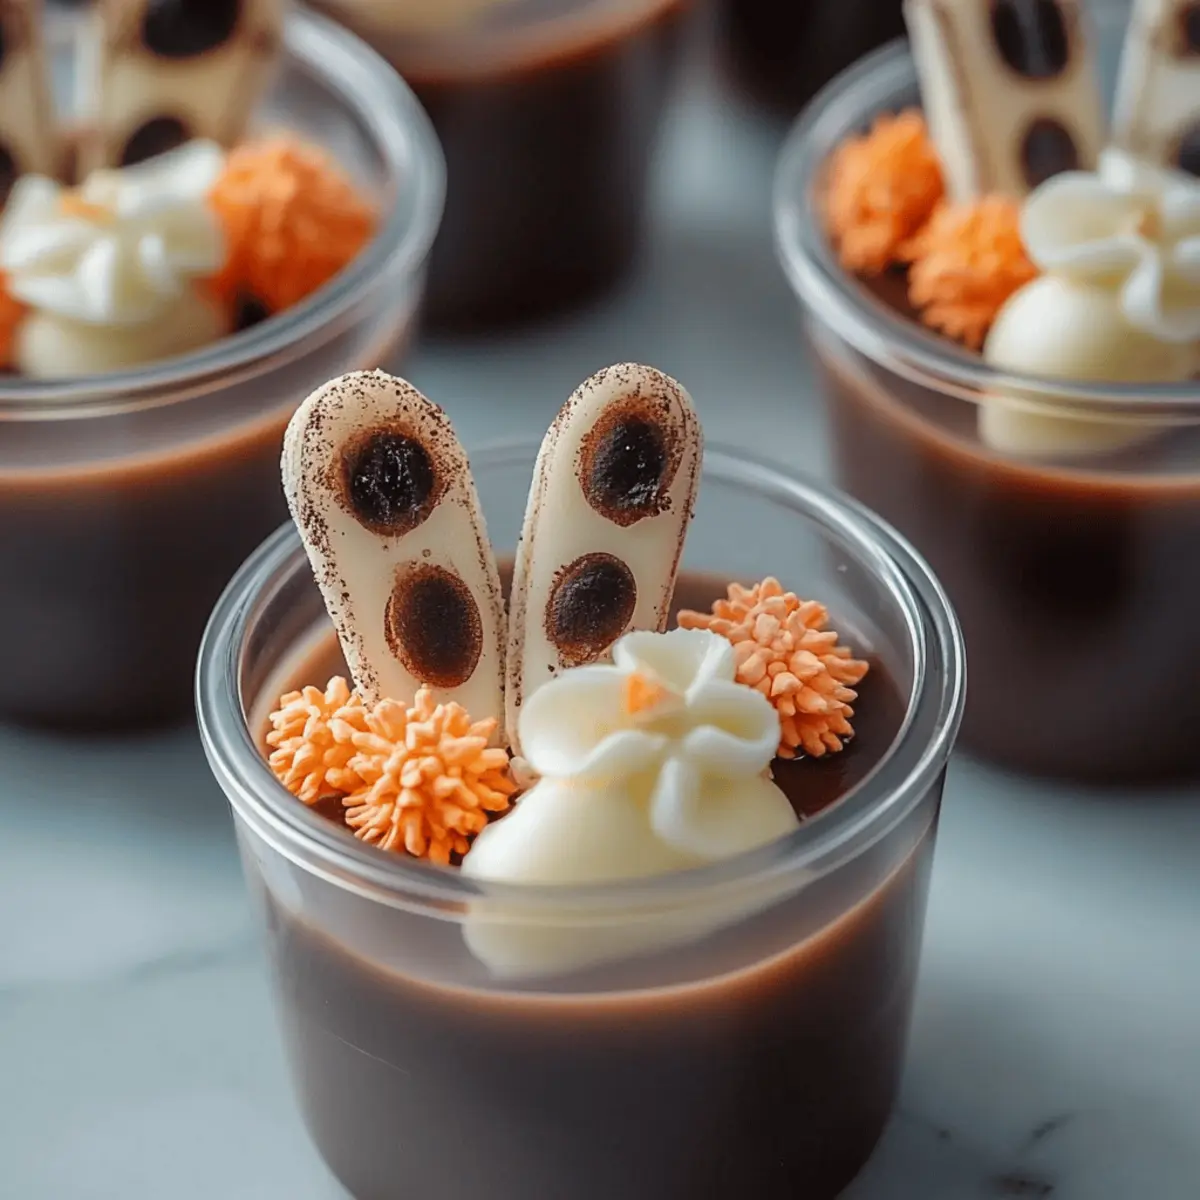
Kid-approved: Everyone loves a hands-on dessert—watch as kids delight in digging through the cookie "dirt" to find gummy worms and cookie tombstones.
Versatile decoration: Personalize your cups with optional candy pumpkins or green sprinkles, making each cup unique to suit your Halloween theme.
Crowd-pleaser: With a combination of creamy, crunchy, and sweet, these cups are sure to satisfy both kids and adults alike!
Halloween Dirt Cups Ingredients
• Get ready to create a spooky delight!
For the Pudding
- Instant chocolate pudding mix – This is the base of your treat, providing that rich chocolate flavor everyone loves.
- Cold milk – Use cold milk for the best creamy consistency; it brings the pudding to life!
- Whipped topping – A light and fluffy layer that adds a cloud-like texture to your cups.
For the "Dirt"
- Chocolate sandwich cookies – These make the perfect "dirt" when crushed, adding a delightful crunch.
For Decoration
- Black decorating gel or melted chocolate – Use this to create spooky tombstones that scream Halloween!
- Gummy worms – These creepy crawlies are a fun touch, making it look like they’re emerging from the "soil."
- Oval cookies – These are your tombstones; personalize them with a spooky message for effect.
- Optional: Candy pumpkins or green sprinkles – Add these for a festive flair and to enhance your Halloween dirt cups.
With these ingredients, you're ready to dig in and create the most adorable Halloween Dirt Cups!
Step‑by‑Step Instructions for Halloween Dirt Cups – Graveyard Pudding Dessert With Cookie Crumble
Step 1: Prepare the Pudding Mixture
In a large mixing bowl, whisk together the instant chocolate pudding mix and 2 cups of cold milk for about 2 minutes, until the mixture thickens and becomes smooth. This creamy base is the foundation of your Halloween Dirt Cups, so make sure to achieve that luscious consistency before moving on.
Step 2: Fold in the Whipped Topping
Once your pudding is ready, gently fold in the 8 oz container of thawed whipped topping until well combined. Be careful not to deflate the whipped topping; it should create a light and fluffy texture that adds to the delight of your pudding cups. Set this mixture aside while you prepare the "dirt."
Step 3: Create the Cookie Crumble
Take 15 chocolate sandwich cookies and place them in a food processor. Pulse until fine crumbs form, resembling soil. If you don’t have a food processor, simply use a zip-top bag and crush the cookies with a rolling pin until they reach the same crumbly consistency. This crunchy layer is essential for your Halloween Dirt Cups.
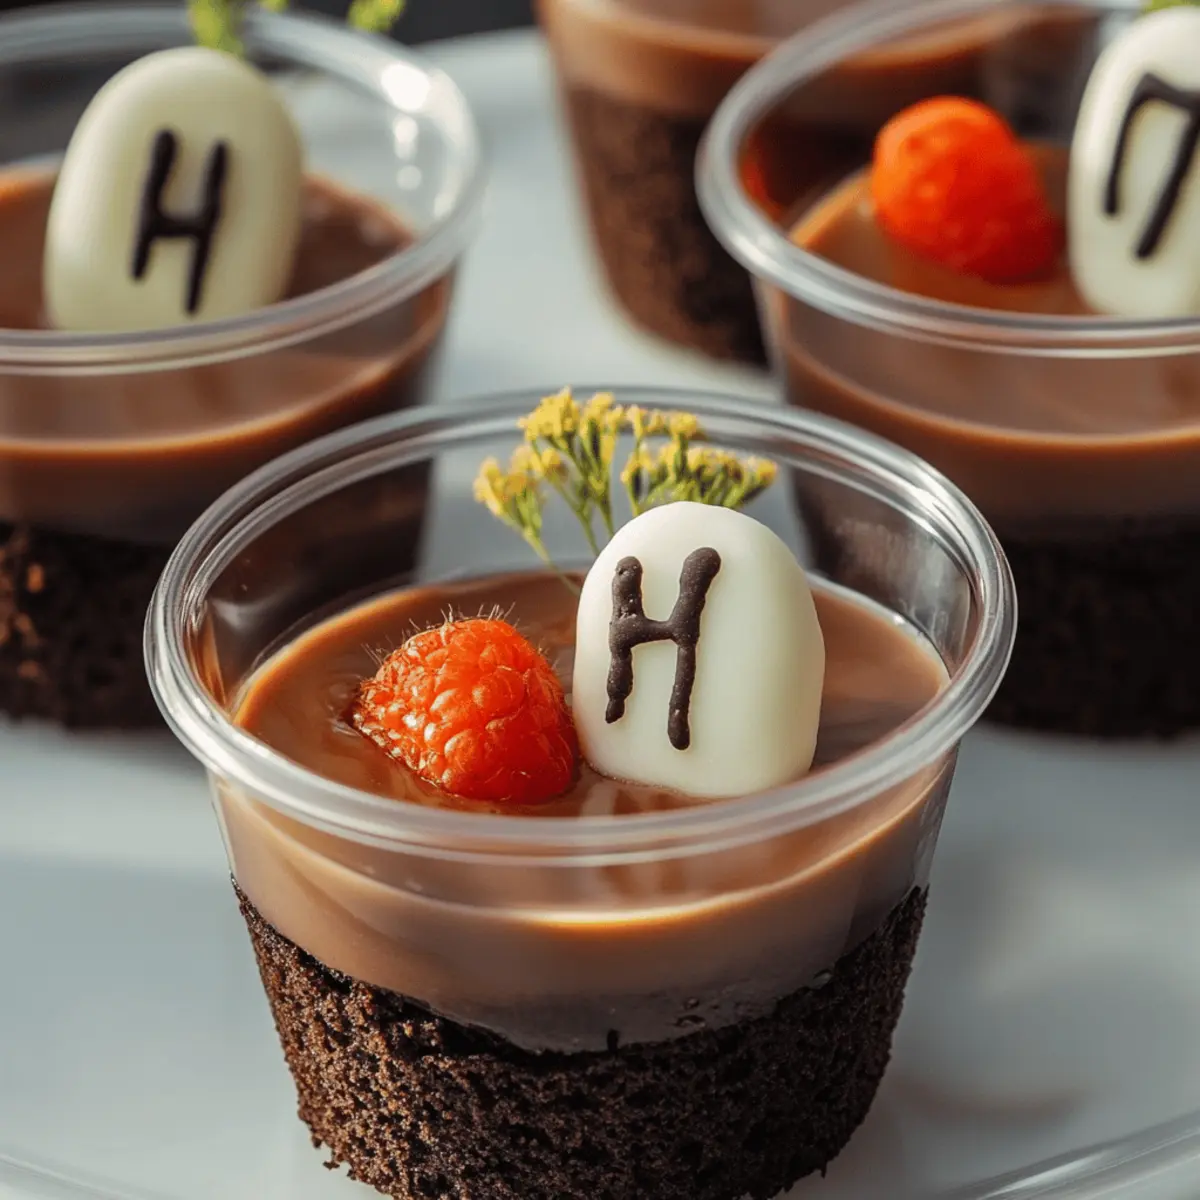
Step 4: Assemble the Pudding Cups
Grab your plastic cups and divide the pudding mixture evenly among them, filling each about three-quarters full. You'll want to achieve a nice base for your "dirt," and the layers will create a delightful presentation for this Graveyard Pudding Dessert that is sure to impress.
Step 5: Add the Cookie Crumble Layer
Sprinkle a generous layer of the cookie crumbs on top of the pudding in each cup to create the "dirt." Make sure to cover the pudding completely so that the visual effect resembles a spooky graveyard. This layer not only looks great but adds a satisfying crunch.
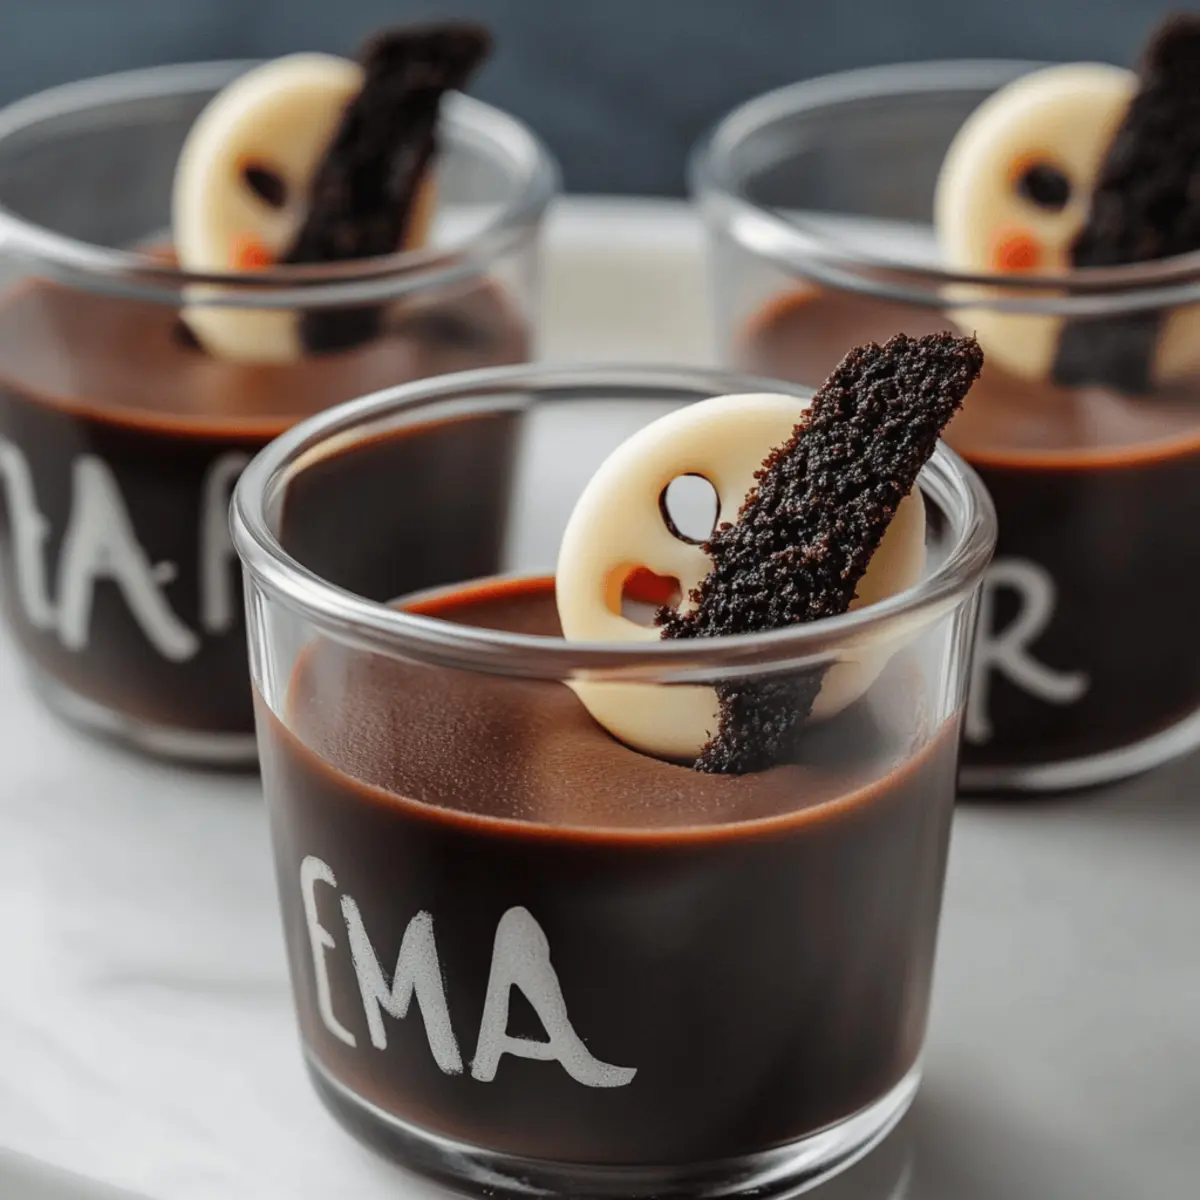
Step 6: Decorate the Tombstones
Using black decorating gel or melted chocolate, write "RIP" on each oval cookie to create the tombstones for your Halloween Dirt Cups. Let the writing set for about 5 minutes to ensure it doesn’t smear, adding a personal and spooky touch to each cup.
Step 7: Insert the Tombstones and Worms
Carefully insert one tombstone cookie into the top of each pudding cup, and then add a gummy worm or two, arranging them so they look like they’re crawling out of the cookie crumb "soil." This final touch brings your graveyard scene to life, making it irresistibly playful.
Step 8: Chill Before Serving
Place the fully assembled Halloween Dirt Cups in the refrigerator to chill for at least 30 minutes. This allows the layers to meld together and the pudding to firm up slightly, enhancing the overall flavor and texture before your guests dig in.
Make Ahead Options
These Halloween Dirt Cups are perfect for meal prep, allowing you to create a fun dessert ahead of time! You can prepare the pudding mixture and cookie crumble up to 24 hours in advance; simply store them separately in the refrigerator. Additionally, you can decorate the oval cookies and refrigerate them for about 3 days without compromising quality. When you’re ready to serve, assemble the cups by layering the pudding mixture and cookie crumbs, then insert the decorated tombstones and gummy worms right before you enjoy them. This way, you’ll have a spooky and fun treat that’s just as delicious, saving you time for all your Halloween festivities!
Halloween Dirt Cups Variations & Substitutions
Customize your Halloween Dirt Cups to surprise and delight your taste buds with these creative variations!
-
Gluten-Free: Substitute chocolate sandwich cookies with gluten-free Oreos for a mischievous treat everyone can enjoy.
-
Dairy-Free: Use almond or oat milk in place of regular milk and a dairy-free whipped topping for a creamy, dairy-free version.
-
Nutty Crunch: Add crushed nuts, like walnuts or almonds, between the layers for an extra crunchy surprise, enhancing texture and flavor.
-
Fruit Twist: Incorporate layers of mashed banana or pureed pumpkin for a delightful twist, adding natural sweetness and moisture.
-
Spicy Kick: Sprinkle a pinch of cinnamon or cayenne pepper into the pudding mix for a cozy heat that balances the sweetness of the dessert.
-
Chocolate Overload: Double the chocolate flavor by mixing in chocolate chips or chunks into the pudding or topping the cups with chocolate shavings for an indulgent treat.
-
Halloween Colors: Swap in colored sprinkles or themed candies to match your Halloween party theme—think orange and purple to ignite the festive spirit!
-
Vegan Delight: Replace the whipped topping with coconut cream and ensure all ingredients are plant-based for a crowd-pleasing vegan dessert option.
These variations make the recipe your own, transforming your Halloween Dirt Cups into a personalized delight for your festive gatherings!
How to Store and Freeze Halloween Dirt Cups
Fridge: Store leftover Halloween Dirt Cups in an airtight container in the refrigerator for up to 3 days. Make sure they are well covered to maintain freshness and prevent drying out.
Freezer: If you plan to freeze any cups, omit the gummy worms and cookie decorations beforehand. Wrap each cup tightly in plastic wrap and then in aluminum foil; they’ll keep well for up to 2 months.
Reheating: Thaw any frozen cups overnight in the refrigerator before serving. Once thawed, reapply decorations fresh for the best appearance and flavor, making them a delightful treat all over again.
Serving: Enjoy these delightful Halloween Dirt Cups chilled, as their creamy chocolate pudding and crunchy cookie layers taste best when served cool!
Expert Tips for Halloween Dirt Cups
• Creamy Base: Ensure your milk is cold when whisking with the pudding mix; this helps create a rich, smooth consistency.
• Gentle Folding: When mixing in the whipped topping, use a gentle folding technique to maintain airiness—this is key for that fluffy texture.
• Crumble Consistency: Achieve fine cookie crumbs for the “dirt” layer by pulsing thoroughly or using a rolling pin. Avoid large chunks to maintain the look and feel.
• Setting Time: Allow the black gel or melted chocolate to fully set before placing the tombstones into the cups, preventing smudges and ensuring sharp details.
• Chill Adequately: Don’t skip the chilling step! Refrigerating for at least 30 minutes enhances flavor blending and makes serving easier. These Halloween Dirt Cups are best enjoyed slightly firm!
What to Serve with Halloween Dirt Cups?
As you revel in the spooky sweetness of these whimsical treats, consider pairing them with playful sides that will enchant your guests even more.
-
Crispy Apple Slices: These refreshing slices offer a crunchy contrast that brightens up the dessert table, adding a hint of sweetness without overwhelming the palate.
-
Ghostly Marshmallow Treats: These adorable treats made from rice cereal and melted marshmallows will delight both kids and adults, mirroring the fun theme with their spook-tacular shapes.
-
Pumpkin Spice Milkshakes: Creamy and dreamy, these shakes infuse warm autumn flavors, creating a delightful beverage that complements the richness of the Halloween Dirt Cups beautifully.
-
Charming Cheese Platter: Include an assortment of cheeses, crackers, and seasonal fruits. The savory elements offer a balance to the sweetness of dessert, inviting guests to mix flavors.
-
Chocolate-Covered Pretzels: With the perfect blend of salty and sweet, these treats provide a satisfying crunch, making them an ideal accompaniment to the soft, creamy pudding.
-
Spooky Trail Mix: A mix featuring nuts, seeds, and candy corn, this fun snack adds a sense of adventure and crunch alongside your Halloween Dirt Cups, perfect for all ages.
Not only do these pairings enhance the experience, but they also create a festive feast that will leave everyone wanting more!
Halloween Dirt Cups Recipe FAQs
How do I choose the best chocolate sandwich cookies for my Halloween Dirt Cups?
Absolutely! Look for cookies that are fresh and have no dark spots all over them, as this indicates staleness. Popular choices include Oreos, which provide a great chocolate flavor and texture. If you’re feeling adventurous, you might try different flavors like mint or peanut butter for unique twists!
What’s the best way to store leftover Halloween Dirt Cups?
Very good question! Store any remaining cups in an airtight container in the refrigerator. They should stay fresh for up to 3 days. Just be sure they're well covered to prevent drying out and keep that creamy texture intact.
Can I freeze Halloween Dirt Cups to enjoy later?
Yes, you can freeze them, but with a couple of adjustments! Remove any gummy worms and cookie decorations before freezing. Wrap each cup tightly in plastic wrap, then in aluminum foil to protect against freezer burn. They can be frozen for up to 2 months. When you’re ready to enjoy, thaw them in the fridge overnight and freshen up the decorations for the ultimate appeal!
What if my pudding mixture doesn't thicken properly?
No worries! If your pudding isn't thickening as expected, check your pudding mix's expiration date—it can sometimes lose effectiveness over time. You can try adding a touch more cold milk and whisking it for a bit longer, but typically, a good whisking for 2 minutes should do the trick. If it still doesn’t set, you might whisk in a teaspoon of cornstarch dissolved in a bit of cold water and let it sit in the fridge for about 10-15 minutes to firm up.
Are there any dietary considerations for Halloween Dirt Cups?
Definitely! To make the cups allergy-friendly, you can use dairy-free pudding mix and whipped topping if you or your guests have dairy allergies. For gluten sensitivities, try gluten-free sandwich cookies as an alternative. Always check labels to ensure all ingredients are safe for specific dietary restrictions.
Can I make Halloween Dirt Cups ahead of time?
Absolutely! You can prepare the pudding mixture and cookie crumble layers a day in advance. Just assemble everything without decorations, cover the cups with plastic wrap, and store them in the refrigerator. When you’re ready to serve, add the tombstones and gummy worms for that fresh touch! This way, you can enjoy the party without any last-minute fuss.
Easy Halloween Dirt Cups: Creepy Graveyard Pudding Delight
Ingredients
Equipment
Method
- In a large mixing bowl, whisk together the instant chocolate pudding mix and cold milk for about 2 minutes until thickened.
- Gently fold in the whipped topping until well combined.
- Crush the chocolate sandwich cookies in a food processor until fine crumbs form.
- Divide the pudding mixture evenly into plastic cups, filling each about three-quarters full.
- Sprinkle a generous layer of cookie crumbs on top of the pudding in each cup.
- Use black gel or melted chocolate to write 'RIP' on each oval cookie, letting it set.
- Insert one tombstone cookie into each pudding cup and add gummy worms.
- Chill the assembled cups in the refrigerator for at least 30 minutes before serving.