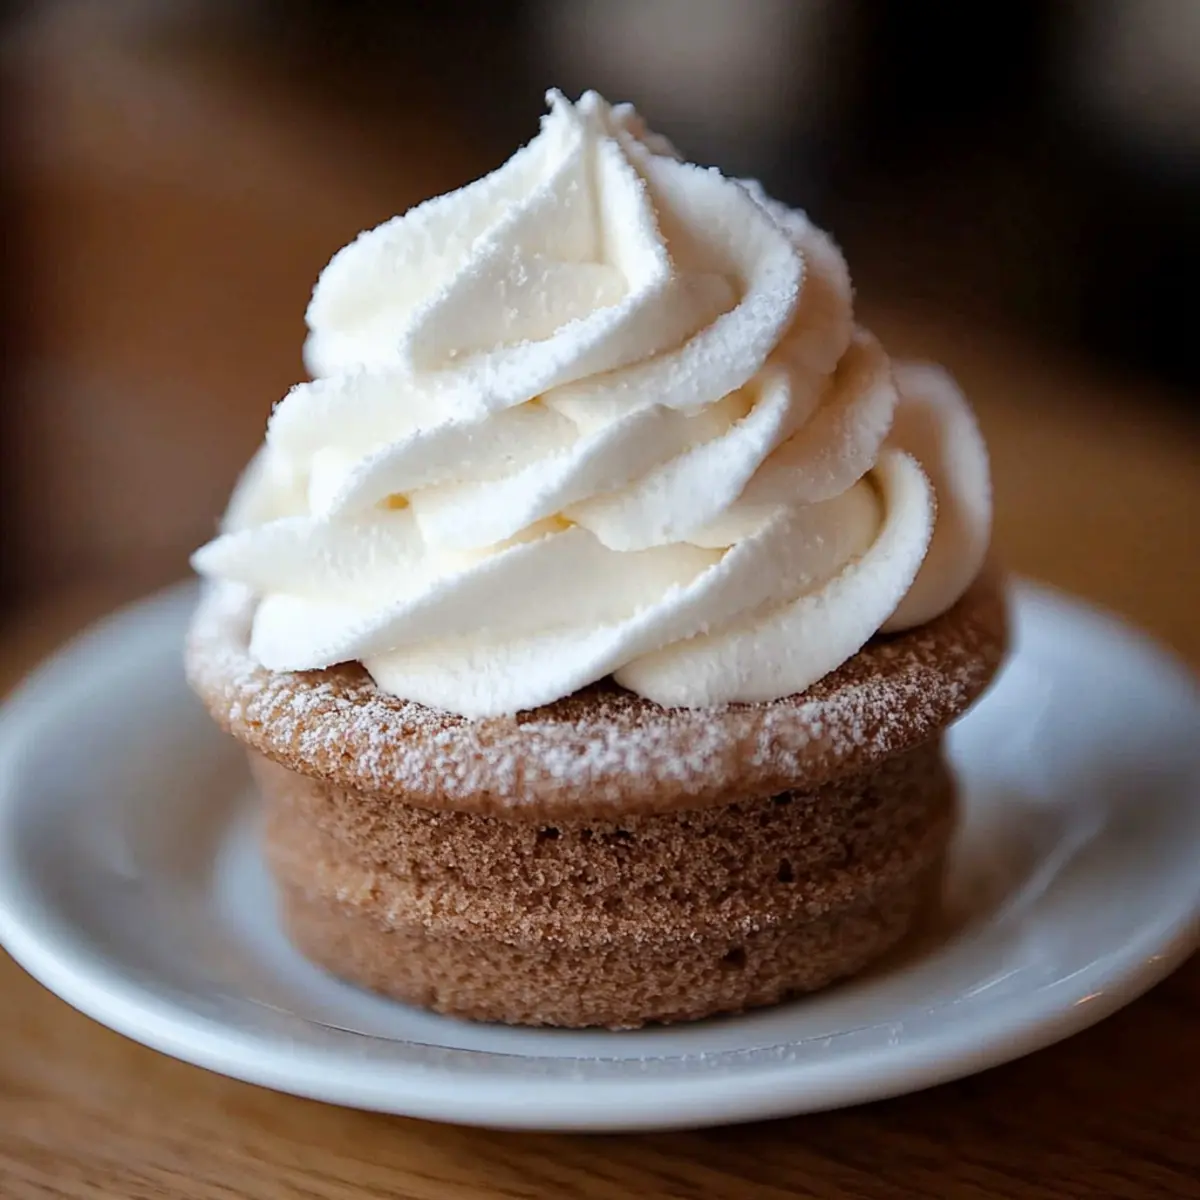
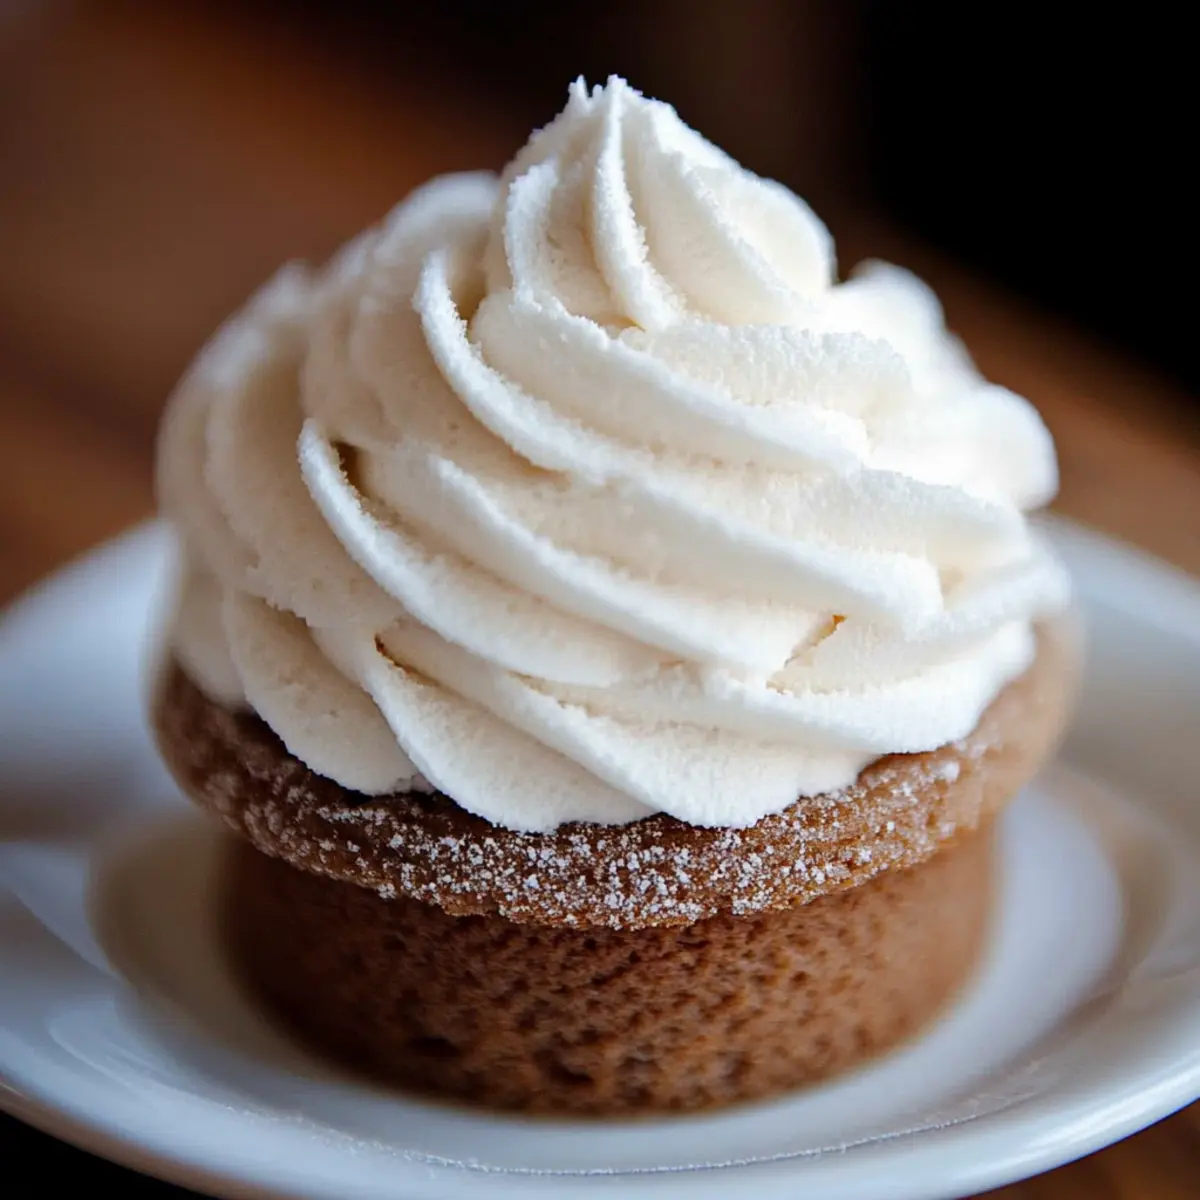
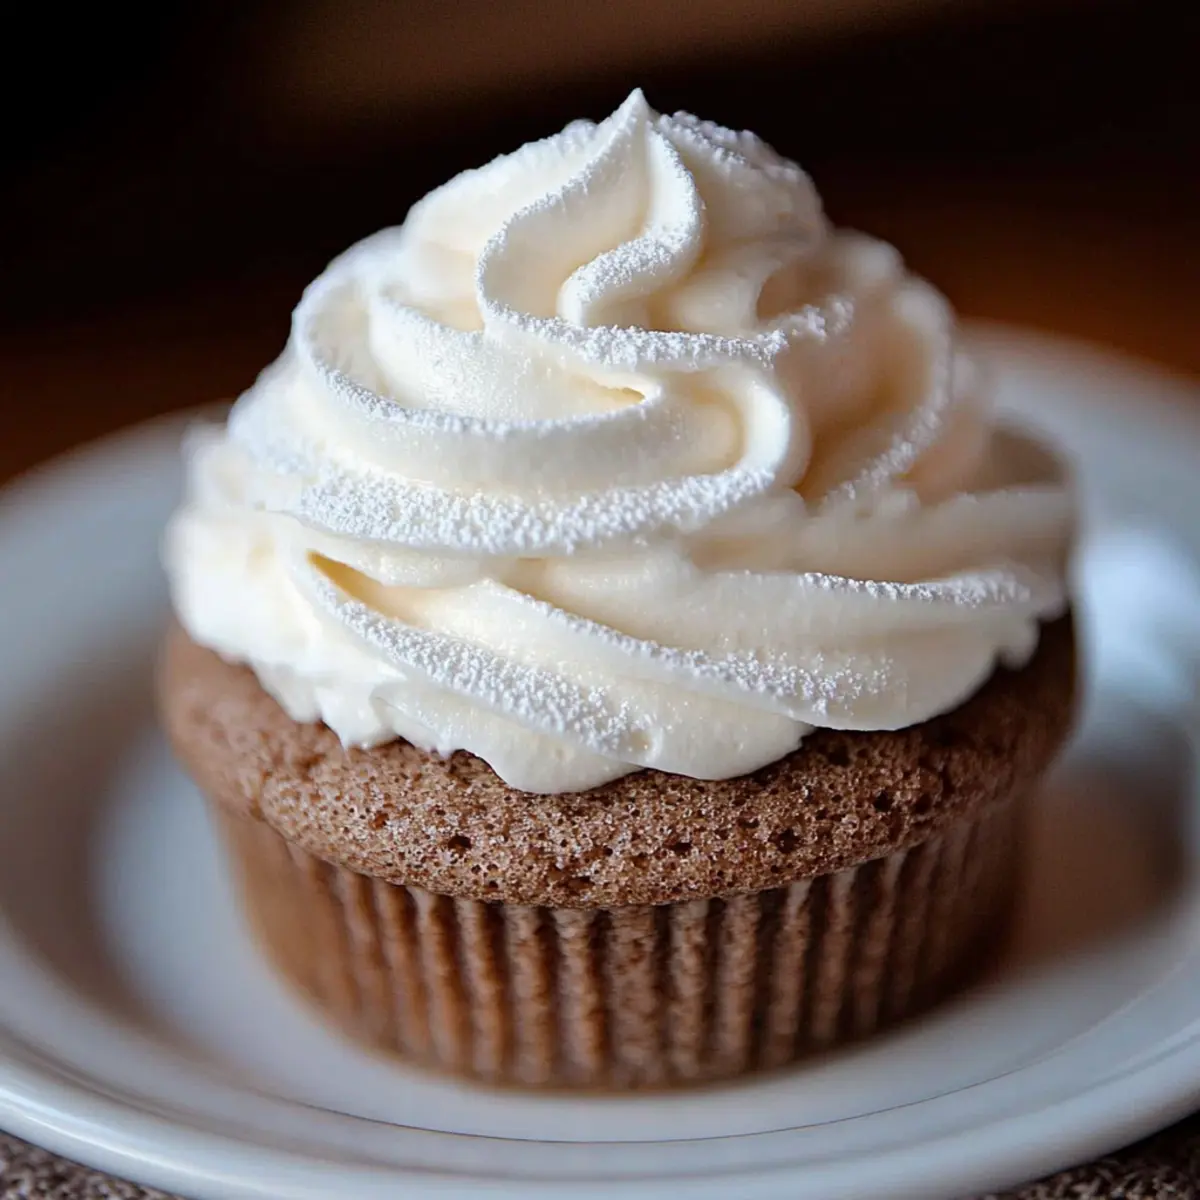
There's a special joy that comes from preparing a homemade treat that transforms your dessert into a masterpiece. Picture this: you’ve just whipped up a light and airy Stabilized Whipped Cream that not only holds its shape beautifully but is also delightful to taste. Whether you're looking to decorate a birthday cake or top off a bowl of fresh berries, this versatile cream takes your creations to a new level—without the need for store-bought alternatives.
A happy kitchen accident led me to this gem of a recipe, where I've experimented with both gelatin and vanilla pudding mix for stabilization. The result? A fantastic whipped cream that survives the test of time and temperatures—perfect for hot summer gatherings or long-lasting cakes that need a little flair. So, if you’re ready to impress your guests and elevate your baking game, let’s dive into how to make this delicious treat that’s destined to become a staple in your kitchen!
Why will you love Stabilized Whipped Cream?
Simplicity and Versatility: This recipe is straightforward, using just a handful of ingredients to create unforgettably delicious whipped cream that’s perfect for decorating cakes and desserts.
Perfect Texture: Its firm yet creamy consistency allows for easy piping and decoration, ensuring your treats look as good as they taste.
Customizable Flavors: Experiment with additions like lemon zest or fresh berries, giving you endless ways to delight your taste buds.
Long-Lasting: Unlike regular whipped cream, this stabilized version stays fresh and holds its shape for days, making it ideal for gatherings and meal prep.
No More Store-Bought: Elevate your desserts with a taste that far surpasses anything you can buy, creating a homemade masterpiece every time.
For even more flavor and texture inspiration, consider checking out this Creamy Raspberry Frosting to pair with your whipped cream!
Stabilized Whipped Cream Ingredients
• Here’s what you’ll need to create this delightful stabilized whipped cream!
For the Whipped Cream Base
• Heavy Whipping Cream – This provides the rich base for a light and airy texture.
• Powdered Sugar – Sweetens the cream; adjust the amount to suit your taste.
• Vanilla Extract – Enhances the flavor, making it irresistibly tasty.
For the Gelatin Method
• Gelatin – Acts as a stabilizer to help the whipped cream hold its shape beautifully; opt for Knox brand.
• Cold Water – Used to bloom the gelatin before mixing, but you can substitute it with some heavy cream if necessary.
For the Vanilla Pudding Mix Method
• Vanilla Pudding Mix – Provides stabilization and adds an extra layer of flavor to your whipped cream.
Full measurements are in the recipe card below.
How to Make Stabilized Whipped Cream
-
Prepare Gelatin (for Gelatin Method): Sprinkle gelatin over cold water in a small bowl and let it bloom for 5 minutes. Heat gently in the microwave for about 5 seconds until completely melted. If needed, add 1 teaspoon of heavy cream and stir to combine.
-
Chill Mixing Bowl: Place a mixing bowl in the refrigerator for about 10 minutes before use. A cold bowl will help achieve the best whipped cream texture.
-
Whip Cream: In the chilled mixing bowl, pour in the heavy whipping cream. Whip on medium speed for about 15 seconds until it begins to thicken slightly.
-
Add Sweeteners: Gradually add the powdered sugar and vanilla extract to the whipped cream. Continue blending on medium speed until soft peaks form, ensuring a sweet and flavorful base.
-
Incorporate Gelatin (for Gelatin Method): Once your whipped cream reaches soft peaks, turn the mixer speed to low and slowly drizzle in the prepared gelatin. Increase back to medium speed and whip until you achieve firm peaks, being cautious not to overmix.
-
For Pudding Mix Method: If using the vanilla pudding mix method, combine all ingredients before beginning to whip. Once the mixture is fluffy and firm peaks form, you’re all set!
Optional: Decorate with fresh berries or a sprinkle of cocoa for an extra touch.
Exact quantities are listed in the recipe card below.
Expert Tips for Stabilized Whipped Cream
• Chill Everything: Ensure your mixing bowl and the heavy whipping cream are thoroughly chilled before starting; this helps achieve the best whip and stability.
• Watch Consistency: Stop mixing as soon as firm peaks form. Overmixing can cause the whipped cream to turn chunky or even turn to butter.
• Immediate Use: Serve the stabilized whipped cream right after preparation for optimal texture, or store it in the refrigerator for up to several days.
• Avoid Citrus: Do not add lemon juice directly, as it can water down your whipped cream; opt for lemon extract instead to keep that fresh flavor.
• Incorporate Wisely: If adding fruit, always drain excess liquid to maintain the texture of your whipped cream without diluting its stability.
• Layering Tips: For cakes, remember that stabilized whipped cream works best for single-layer designs; avoid using it for multi-tiered cakes to prevent sagging.
Stabilized Whipped Cream Variations
Feel free to get creative and personalize this delightful whipped cream to match your dessert dreams!
-
Citrus Twist: Add lemon zest or extract for a bright, fresh flavor that pairs beautifully with summer desserts.
-
Berry Blend: Fold in freshly drained berries, such as strawberries or raspberries, to introduce a burst of fruity goodness.
-
Chocolate Lovers: Incorporate cocoa powder or melted chocolate into the whipped cream for a rich, indulgent treat that's irresistible.
-
Nutty Delight: Stir in finely crushed nuts or a splash of nut extract, like almond or hazelnut, for a delightful crunch and flavor.
-
Spiced Warmth: Sprinkle in some cinnamon or pumpkin spice for a comforting, seasonal twist that’s perfect for fall desserts.
-
Mocha Magic: Blend in instant coffee granules or espresso powder for a luscious whipped cream that satisfies your coffee cravings.
-
Minty Fresh: Add peppermint extract and green food coloring for a festive touch that’s perfect for holiday treats or chocolate desserts.
-
Vanilla Pudding Mix: Swap gelatin for vanilla pudding mix, mixing it with sugar and vanilla extract for added flavor and stability. This method is a delicious twist worth trying!
How to Store and Freeze Stabilized Whipped Cream
Fridge: Store stabilized whipped cream in an airtight container in the refrigerator for up to 5 days. This will help maintain its texture and shape.
Freezer: You can freeze stabilized whipped cream for up to 2 months in a freezer-safe container. Thaw in the refrigerator before using, and gently re-whip if necessary.
Reheating: Avoid heating stabilized whipped cream as it may lose its structure. Instead, use it cold straight from the fridge or thawed from the freezer.
Best Use: For optimal flavor and consistency, use your stabilized whipped cream shortly after preparation; it’s at its finest when fresh!
What to Serve with Stabilized Whipped Cream?
Indulging in a light, fluffy treat can transform any dessert into a crowd-pleaser, and this whipped cream is no exception.
-
Fresh Berries: Their natural sweetness and tartness balance the rich cream beautifully, making every bite feel like a festival of flavors.
-
Chocolate Cake: The deep, rich chocolate pairs perfectly with the creamy texture of stabilized whipped cream, transforming a simple dessert into an indulgent experience.
-
Pavlova: This meringue dessert offers a crispy exterior and soft, airy center that harmonizes with the cream, creating a delicious interplay of textures.
-
Fruit Tart: With a flaky crust and vibrant fruits, a fruit tart topped with whipped cream elevates the visual appeal while enhancing the overall flavor.
-
Coffee Drinks: A dollop of stabilized whipped cream on top of your hot or iced coffee adds a luxurious touch, making your daily coffee feel like a treat.
-
Pumpkin Pie: The warmth of spices from the pie combined with the cool whipped cream creates a comforting dessert experience, perfect for autumn gatherings.
-
Ice Cream Sundaes: Add a scoop of your favorite flavor and drizzle some chocolate sauce; the whipped cream adds a delightful creaminess to each spoonful.
-
Cheesecake: Whether it's plain or topped with fruit, cheesecake pairs beautifully with whipped cream, bringing it together for a luscious dessert experience.
Stabilized Whipped Cream Recipe FAQs
What is the difference between whipped cream and stabilized whipped cream?
Whipped cream is simply heavy cream that has been beaten until light and airy, but it doesn’t hold its shape for long. Stabilized whipped cream has a stabilizer (like gelatin or pudding mix) added, which helps it maintain its texture and shape for days, making it perfect for decoration on cakes or desserts.
How long will stabilized whipped cream hold up?
Absolutely! When stored properly in the fridge in an airtight container, stabilized whipped cream can hold its shape and stay fresh for up to 5 days. If you need it to last even longer, it can be frozen for up to 2 months. Just make sure to thaw it in the fridge and give it a gentle re-whip if necessary before using!
Does cream of tartar stabilize whipped cream?
Yes, cream of tartar can be used as a stabilizer, but it’s usually less common than gelatin or pudding mix. It works best when combined with sugar and can help create a firmer texture. If you'd like to experiment, simply add about ¼ teaspoon of cream of tartar per cup of heavy cream during whipping!
Can stabilized whipped cream be piped?
Very much so! The firmness provided by the stabilizers means you can easily pipe stabilized whipped cream into beautiful swirls and shapes for decorating cakes or cupcakes. Just ensure your whipped cream reaches firm peaks before using it for piping to achieve the best results.
What do bakeries use to stabilize whipped cream?
Many bakeries opt for professional stabilizers, like powdered gelatin or stabilizer blends that often include cornstarch. These commercial options help whipped cream hold up even longer in various temperatures while maintaining texture and flavor. For a home cook, the gelatin or pudding mix methods we discussed in this recipe are fantastic alternatives!
What is the best stabilizer for whipped cream?
The best stabilizer often depends on your needs. If you're looking for a simple method, gelatin is a favorite among many, as it effectively maintains shape and longevity. Alternatively, using vanilla pudding mix provides both stabilization and extra flavor. Overall, I recommend starting with gelatin for its versatility and proven results!
The Best Stabilized Whipped Cream Recipe for Every Sweet Treat
Ingredients
Method
- Prepare Gelatin (for Gelatin Method): Sprinkle gelatin over cold water in a small bowl and let it bloom for 5 minutes. Heat gently in the microwave for about 5 seconds until completely melted. If needed, add 1 teaspoon of heavy cream and stir to combine.
- Chill Mixing Bowl: Place a mixing bowl in the refrigerator for about 10 minutes before use. A cold bowl will help achieve the best whipped cream texture.
- Whip Cream: In the chilled mixing bowl, pour in the heavy whipping cream. Whip on medium speed for about 15 seconds until it begins to thicken slightly.
- Add Sweeteners: Gradually add the powdered sugar and vanilla extract to the whipped cream. Continue blending on medium speed until soft peaks form, ensuring a sweet and flavorful base.
- Incorporate Gelatin (for Gelatin Method): Once your whipped cream reaches soft peaks, turn the mixer speed to low and slowly drizzle in the prepared gelatin. Increase back to medium speed and whip until you achieve firm peaks, being cautious not to overmix.
- For Pudding Mix Method: If using the vanilla pudding mix method, combine all ingredients before beginning to whip. Once the mixture is fluffy and firm peaks form, you’re all set!
Nutrition
Notes
- Chill Everything: Ensure your mixing bowl and the heavy whipping cream are thoroughly chilled before starting; this helps achieve the best whip and stability.
- Watch Consistency: Stop mixing as soon as firm peaks form. Overmixing can cause the whipped cream to turn chunky or even turn to butter.
- Immediate Use: Serve the stabilized whipped cream right after preparation for optimal texture, or store it in the refrigerator for up to several days.
- Avoid Citrus: Do not add lemon juice directly, as it can water down your whipped cream; opt for lemon extract instead to keep that fresh flavor.
- Incorporate Wisely: If adding fruit, always drain excess liquid to maintain the texture of your whipped cream without diluting its stability.
- Layering Tips: For cakes, remember that stabilized whipped cream works best for single-layer designs; avoid using it for multi-tiered cakes to prevent sagging.