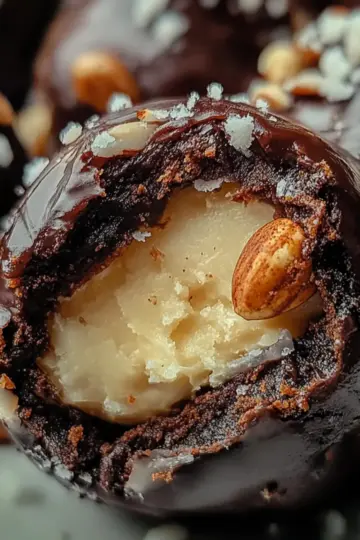
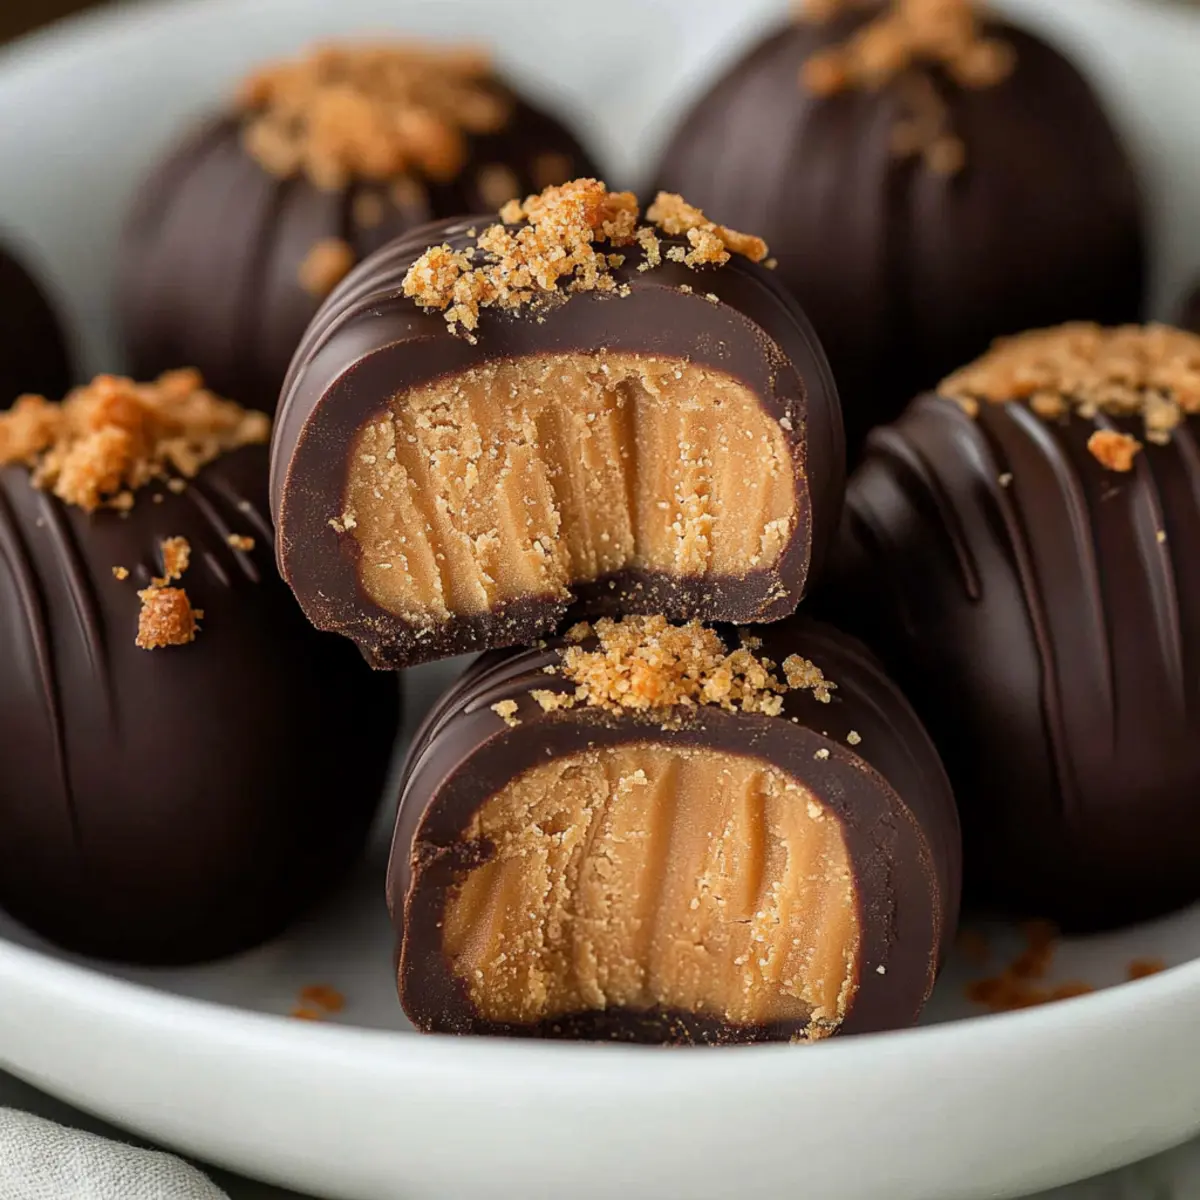
When the craving for something sweet strikes, nothing beats the simplicity and indulgence of these Butterfinger Balls. Picture this: creamy peanut butter, crunchy graham crackers, and bits of that iconic Butterfinger candy, all enrobed in silky chocolate. Sounds divine, right? What’s even better is that these delightful bites require zero baking. Yes, you heard me—no oven needed!
I first whipped up this easy no-bake treat back when I was hosting a casual get-together, completely stumped on what to serve. An unexpected kitchen adventure led me to this recipe, and let me tell you, these Butterfinger Balls stole the show! Perfect for potlucks, parties, or simply for satisfying your sweet tooth, they manage to bring joy and nostalgia in each bite.
So, if you’re ready to impress your family and friends or simply treat yourself to something truly delicious, grab your ingredients and follow me into a world of no-bake bliss!
Why are Butterfinger Balls a must-try?
Simple and Quick: These Butterfinger Balls come together in no time, making them the ultimate last-minute treat for gatherings.
Decadent Flavor: The blend of creamy peanut butter, crushed Butterfinger pieces, and smooth chocolate creates an irresistible flavor profile that everyone will adore.
No-Bake Convenience: Forget the oven! Just mix, roll, chill, and dip—it's that easy!
Fun Customization: Add your favorite toppings or try different candy bars for a unique twist; the possibilities are endless!
Crowd-Pleasing Delight: Perfect for parties, these treats are always a hit and sure to spark joy. Treat your taste buds to something special today!
Butterfinger Balls Ingredients
Indulge in these delightful no-bake treats with just a few simple ingredients!
For the Base
• Creamy Peanut Butter – Provides the base flavor and creamy texture; use regular peanut butter and not an all-natural kind.
• Softened Butter – Adds richness and helps bind the ingredients; do not use margarine, as it creates an oily texture.
• Vanilla Extract – Enhances overall flavor for a delightful touch.
For the Sweetness
• Powdered Sugar – Sweetens and thickens the mixture, giving it that perfect sweetness.
• Graham Cracker Crumbs – Provides texture and structure; you can buy pre-crumbled crackers or crush your own.
For the Candy Coating
• Crushed Butterfinger Candy Bars – The key flavor and texture ingredient; Butterfinger bits work beautifully here.
• Chocolate Bark or Chocolate Chips – For dipping the balls; chocolate bark creates the smoothest finish without needing tempering.
For the Garnish
• Additional Crushed Butterfingers, Holiday Sprinkles, or Coarse Salt – Perfect for that final touch of decoration on top!
Full measurements are in the recipe card below.
How to Make Butterfinger Balls
- Combine Wet Ingredients: In a mixing bowl, combine 1 cup of creamy peanut butter and ½ cup of softened butter; mix together until creamy and fully blended.
- Add Vanilla: Next, stir in 1 teaspoon of vanilla extract to the peanut butter mixture for an extra layer of flavor.
- Incorporate Dry Ingredients: Gradually add 2 cups of powdered sugar, mixing on low speed until combined, and be sure to scrape down the sides of the bowl as needed.
- Add Texture: Gently fold in 1 ½ cups of graham cracker crumbs and 1 cup of crushed Butterfinger candy, mixing until evenly distributed throughout the mixture.
- Form and Chill: Scoop 1 ½ tablespoons of the mixture and roll them into balls. Place the balls on a parchment-lined baking sheet and freeze for 30 minutes to help them set.
- Melt Chocolate: Melt your dipping chocolate (either chocolate bark or chocolate chips) in a microwave in 30-second intervals, stirring until smooth, or use a double boiler method for better control over the heat.
- Dip and Decorate: Once melted, dip the chilled balls into the chocolate until fully coated, or leave some of the peanut butter mixture exposed. Top with additional crushed Butterfingers, colorful sprinkles, or a sprinkle of coarse salt for a delightful finish.
Optional: Drizzle extra chocolate over the tops for an eye-catching touch!
Exact quantities are listed in the recipe card below.
Butterfinger Balls Variations
Get ready to personalize these delightful Butterfinger Balls and create something uniquely yours!
- Nutty Twist: Swap out creamy peanut butter for crunchy peanut butter for an added layer of texture and nutty flavor. Your taste buds will thank you!
- Chocolate Lovers: Dive deeper into decadence by drizzling melted chocolate on top after dipping. This extra layer adds visual appeal and richness.
- Different Candies: Substitute Butterfinger with your favorite candy bars, like Snickers or Reese’s, for a completely new taste that’ll surprise and delight!
- Vegan Treats: Use plant-based butter and vegan chocolate to make a dairy-free version that everyone can enjoy without compromising on flavor.
- Spiced Up: Add a pinch of cinnamon or a splash of orange zest into the mixture for a warm, aromatic twist that elevates the classic recipe.
- Crunchy Alternatives: If you’re avoiding Butterfingers, consider using crushed pretzels or popcorn for a sweet-and-salty explosion that provides an unexpected crunch.
- Flavor Infusion: Mix in a few tablespoons of melted coconut oil to the chocolate for a tropical hint and smoother texture.
- Fruit Fun: Fold in finely chopped dried fruits, such as cranberries or raisins, for a sweet and chewy addition that balances the richness of the chocolate.
Experiment, have fun, and let your creativity shine with these tasty twists!
Expert Tips for Butterfinger Balls
- Room Temperature Ingredients: Use room temperature peanut butter and butter to ensure a smooth, creamy texture that's easy to mix.
- Careful Chocolate Melting: When melting chocolate, do it slowly to avoid overheating, which can cause the chocolate to seize.
- Double Boiler Method: Opt for a double boiler when melting chocolate for better control and a smooth, glossy finish for your Butterfinger Balls.
- Avoid Water Contact: Be sure no water gets into your chocolate while melting, as even a drop can ruin its consistency.
- Perfectly Chilled Balls: Don’t skip the chilling step! Freezing the balls for 30 minutes helps them hold their shape while being dipped in chocolate.
How to Store and Freeze Butterfinger Balls
Room Temperature: Store Butterfinger Balls in an airtight container at room temperature for up to 3 days, but they taste freshest when chilled.
Fridge: Keep in the refrigerator in an airtight container for up to a week, ensuring they remain firm and deliciously indulgent.
Freezer: These treats can be frozen for 5-6 months. Arrange in a single layer, then transfer to a freezer-safe bag or container. Thaw at room temperature or in the fridge when you're ready to enjoy.
Reheating: There's no need to reheat Butterfinger Balls; simply enjoy them cold for the ultimate sweet crunch experience!
What to Serve with Butterfinger Balls?
Creating the perfect gathering isn’t just about the main attraction; it’s about the entire experience of flavors and treats that will leave everyone smiling.
- Chilled Milk: A classic pairing that complements the sweet and creamy texture of Butterfinger Balls, offering just the right balance.
- Coffee or Espresso: The rich notes of a bold brew enhance the sweetness, making for a delightful afternoon treat.
- Fruit Skewers: Fresh fruits like strawberries and oranges bring a refreshing contrast to the rich peanut butter and chocolate, adding a burst of color.
- Mini Cheesecakes: These creamy bites are a fantastic pairing, adding a layer of richness that beautifully complements the flavors of Butterfinger Balls.
- Ice Cream Sundaes: Celebrate with a scoop of vanilla or chocolate ice cream topped with warm chocolate sauce—perfection alongside a chilled Butterfinger treat!
- Chocolate-Covered Pretzels: For a delightful salty-sweet crunch, these treats echo the flavors of the Butterfinger Balls while adding diverse textures.
- Party Punch: A lightly fruity punch offers a refreshing sip that cleanses the palate between bites of these indulgent sweets.
Each of these options enhances your Butterfinger Balls, creating a joyous and memorable spread that your guests will absolutely love!
Butterfinger Balls Recipe FAQs
What type of peanut butter is best for Butterfinger Balls?
Absolutely! I recommend using regular, creamy peanut butter for the best flavor and texture. Avoid all-natural varieties, as they can be too oily and won’t hold the balls together as well.
How long can I store Butterfinger Balls in the refrigerator?
You can store Butterfinger Balls in an airtight container in the refrigerator for up to a week. They stay delightfully firm and ready for snacking!
Can I freeze Butterfinger Balls for later?
Yes, you can freeze Butterfinger Balls for up to 5-6 months! Simply arrange them in a single layer on a parchment-lined tray, freeze until solid, and then transfer them to a freezer-safe bag. When you’re ready to indulge, just thaw them at room temperature or in the fridge.
My Butterfinger Balls are too soft, what can I do?
If your mixture turns out too soft, it may be due to warm ingredients or not enough graham cracker crumbs. To fix this, simply add more graham cracker crumbs gradually until you achieve the right consistency. Also, make sure to chill the balls for at least 30 minutes before dipping them in chocolate.
Are Butterfinger Balls safe for kids with nut allergies?
No, Butterfinger Balls contain peanut butter, which is a common allergen. For a nut-free alternative, I suggest using sun butter or crushed rice Chex in place of peanut butter. They won't replicate the taste exactly but will yield a tasty, nut-free treat!
Can I use dark chocolate instead of milk chocolate for dipping?
Very! Dark chocolate can add a richer flavor profile to your Butterfinger Balls. Just keep in mind that the overall sweetness may be reduced, so you might want to sprinkle a bit more powdered sugar in the mixture for balance.
Enjoy these sweet treats with peace of mind, knowing you're equipped with all the answers!
Irresistibly Easy Butterfinger Balls for Guilt-Free Indulgence
Ingredients
Method
- In a mixing bowl, combine 1 cup of creamy peanut butter and ½ cup of softened butter; mix together until creamy and fully blended.
- Next, stir in 1 teaspoon of vanilla extract to the peanut butter mixture for an extra layer of flavor.
- Gradually add 2 cups of powdered sugar, mixing on low speed until combined, and be sure to scrape down the sides of the bowl as needed.
- Gently fold in 1 ½ cups of graham cracker crumbs and 1 cup of crushed Butterfinger candy, mixing until evenly distributed throughout the mixture.
- Scoop 1 ½ tablespoons of the mixture and roll them into balls. Place the balls on a parchment-lined baking sheet and freeze for 30 minutes to help them set.
- Melt your dipping chocolate (either chocolate bark or chocolate chips) in a microwave in 30-second intervals, stirring until smooth, or use a double boiler method for better control over the heat.
- Once melted, dip the chilled balls into the chocolate until fully coated, or leave some of the peanut butter mixture exposed. Top with additional crushed Butterfingers, colorful sprinkles, or a sprinkle of coarse salt for a delightful finish.
Nutrition
Notes
- Use room temperature peanut butter and butter to ensure a smooth, creamy texture that's easy to mix.
- When melting chocolate, do it slowly to avoid overheating, which can cause the chocolate to seize.
- Opt for a double boiler when melting chocolate for better control and a smooth, glossy finish for your Butterfinger Balls.
- Be sure no water gets into your chocolate while melting, as even a drop can ruin its consistency.
- Don’t skip the chilling step! Freezing the balls for 30 minutes helps them hold their shape while being dipped in chocolate.