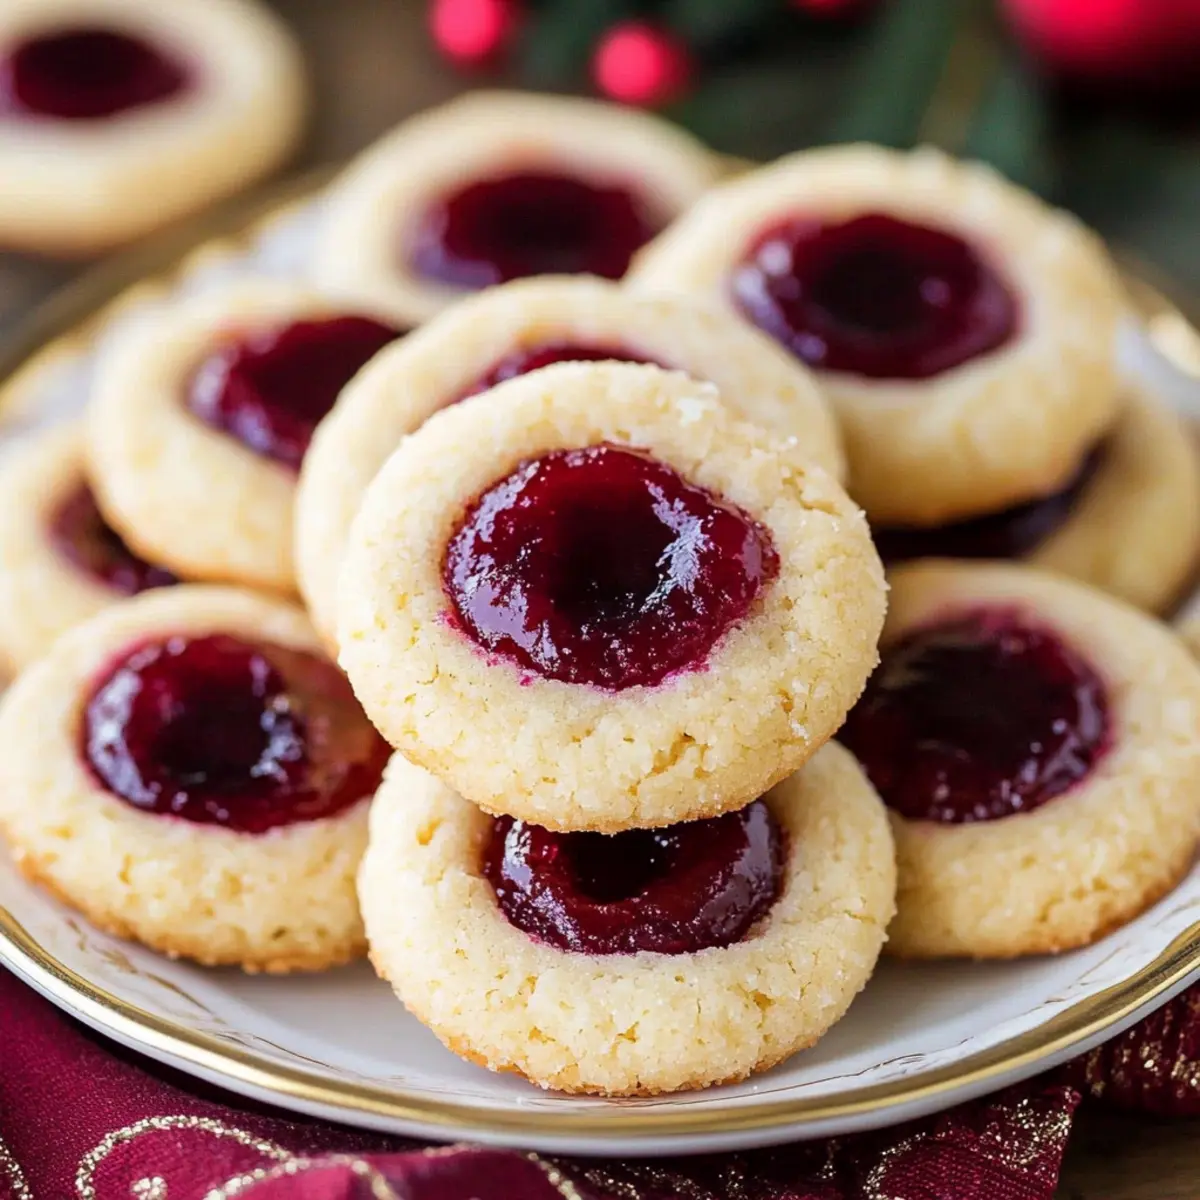
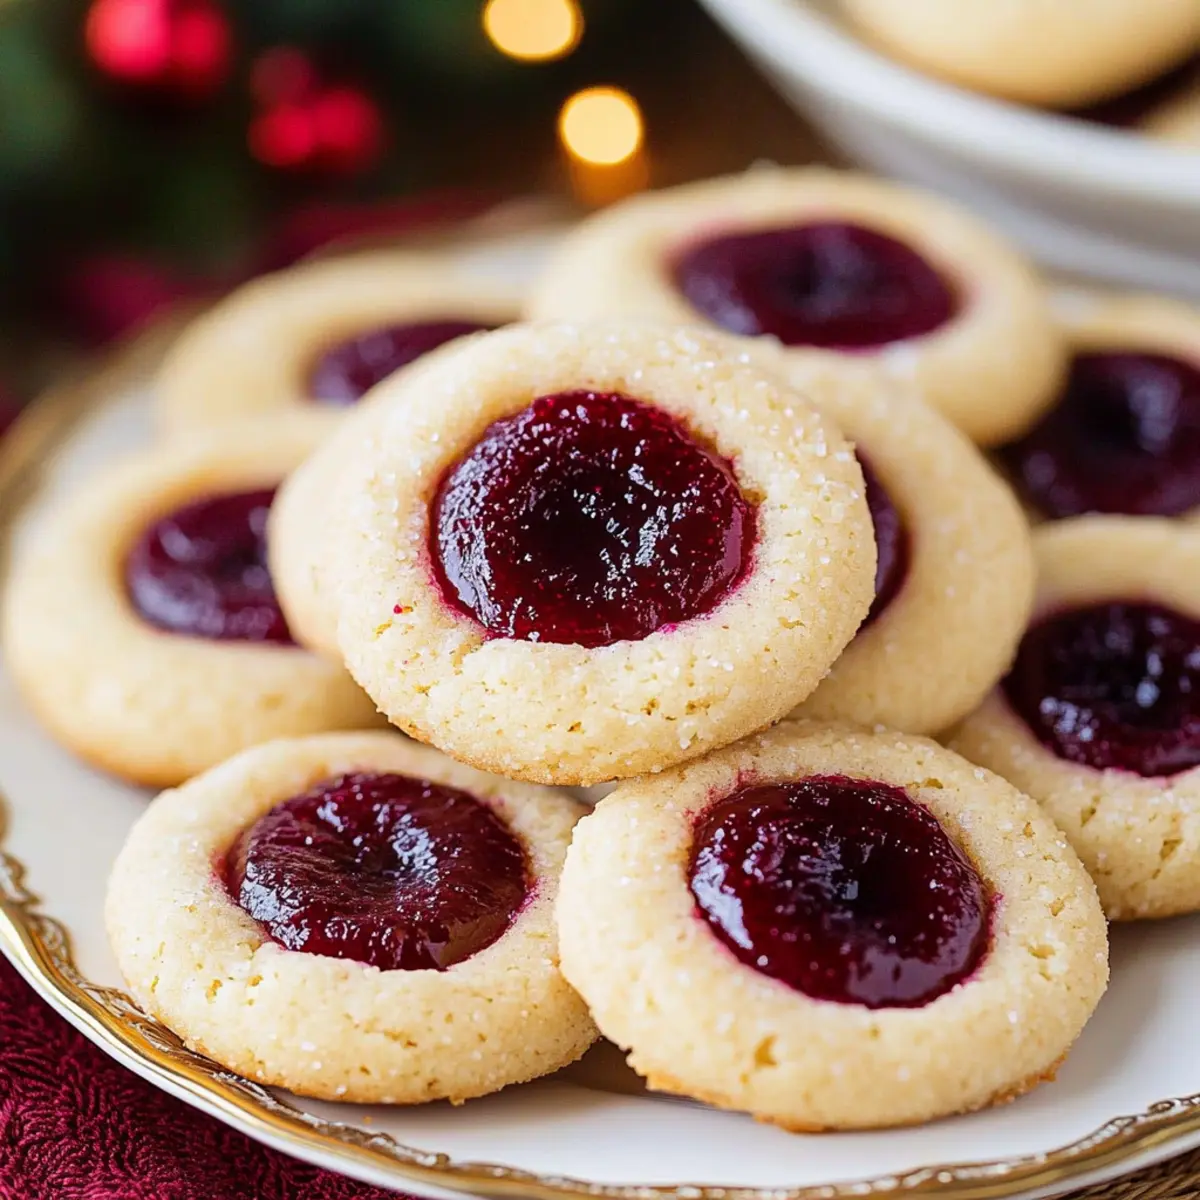
When the first whispers of winter breeze past my window, I find myself yearning for the comforting rituals of the season. It’s the time of year when baking becomes a warm embrace, and my kitchen fills with sweetness and nostalgia. This classic thumbprint cookie recipe has become a cherished highlight of my holiday baking, featuring a soft sugar cookie base adorned with a glimmering layer of sugar and crowned with luscious raspberry preserves.
The magical moment when you press your thumb into the dough is not just about creating a little space for jam; it’s a playful invitation to savor each bite. With plenty of variations—think chocolaty bourbon-infused twists or vibrant key lime—you can customize this recipe to suit your festive spirit. So, dust off that apron, and let’s bring a little holiday magic to life with these delightful Christmas thumbprint cookies that are as easy to make as they are to devour!
Why are Christmas Thumbprint Cookies a must-try?
Comforting Tradition: These Christmas thumbprint cookies evoke joyful memories with every bite, bringing warmth and nostalgia to your holiday season.
Versatile Choices: Mix up flavors with options like chocolaty bourbon or zingy key lime, ensuring everyone finds their favorite.
Quick to Make: The simple process means you can whip up a batch even on busy holiday days.
Crowd-Pleasing Treat: Perfectly bite-sized, they are great for sharing at parties or gifting to loved ones!
Delightful Presentation: Their sugared exteriors and glossy jam centers create a stunning display on any dessert table.
Christmas Thumbprint Cookie Ingredients
• Full measurements are in the recipe card below.
For the Cookie Dough
Unsalted Butter – Provides richness & structure; make sure it’s softened for easy mixing.
Sugar – Adds sweetness and depth to your cookies.
Light Brown Sugar – Brings moisture and delightful caramel notes for a richer flavor.
Egg Yolk – Adds richness and helps bind the dough for perfect texture.
Vanilla Extract – Enhances the overall flavor with its warm, comforting aroma.
All-Purpose Flour – Offers structure, ensuring your cookies hold their shape.
Cornstarch – Creates a softer, more tender cookie for that melt-in-your-mouth experience.
Salt – Balances the sweetness and elevates all flavors beautifully.
For Rolling
Sugar for Rolling (Optional) – Creates a sparkling exterior that’s simply irresistible.
For the Filling
Jam or Preserves (Raspberry Preserves used) – Provides luscious filling and flavor; substitute with your favorite fruit preserves for a personal touch. Use something like key lime to match your festive spirit!
How to Make Christmas Thumbprint Cookies
-
Cream Together: In a stand mixer, cream together the softened unsalted butter, sugar, and light brown sugar until light and fluffy, about 3-5 minutes. This will create a base full of flavor and richness.
-
Add Egg and Vanilla: Next, add the egg yolk and vanilla extract. Beat until well combined, ensuring all ingredients are fully incorporated and creamy.
-
Whisk Dry Ingredients: In a separate bowl, whisk together the all-purpose flour, cornstarch, and salt. This ensures even distribution of the dry ingredients to create a balanced dough.
-
Combine Wet and Dry: Gradually add the dry mixture to the wet ingredients on low speed until just combined. The dough may appear dry and crumbly—don’t worry! Use your hands to finish mixing, forming it into a cohesive dough.
-
Roll Dough Balls: Roll the dough into 1 tablespoon-sized balls and place them on a wax-paper-covered plate or small cookie sheet. This step makes for perfectly-sized treats!
-
Sugar Coating: If desired, roll each ball in granulated sugar to create a sparkling exterior, enhancing both look and taste.
-
Create Indentations: Press your thumb (or the rounded back of a teaspoon) gently into the center of each cookie dough ball to make a perfect thumbprint. This is where the jam will go!
-
Chill the Dough: Transfer the cookie dough to the freezer and chill for 30 minutes. This helps to maintain their shape during baking.
-
Preheat Oven: Meanwhile, preheat your oven to 375°F (190°C) so it’s ready when the cookies are prepared.
-
Heat the Jam: Heat the jam in the microwave for 5-10 seconds, just until it’s easy to stir but not hot. This will make it easier to spoon into the cookies.
-
Fill Thumbprints: Spoon the warmed jam into each thumbprint, filling them generously to the brim, reflecting the cookie’s flavor and festive spirit.
-
Bake the Cookies: Bake at 375°F (190°C) for about 11 minutes, or until the edges are just beginning to turn golden brown. A delightful aroma will fill your kitchen!
-
Cool Down: Allow the cookies to cool completely on the baking sheet before serving. This ensures they set perfectly and are ready for your holiday gatherings.
Optional: Sprinkle with a dash of powdered sugar for an extra festive touch.
Exact quantities are listed in the recipe card below.
What to Serve with Christmas Thumbprint Cookies?
When the holiday spirit fills the air, these charming cookies become an inviting centerpiece for your festive gatherings.
- Hot Cocoa: A rich, chocolatey drink that pairs perfectly with the sweet and tart flavors of the cookies, making every bite more delightful.
- Eggnog: This creamy holiday classic complements the cookies' sweetness and adds a festive touch to your dessert tray.
- Fresh Fruit Salad: A refreshing mix of seasonal fruits balances the richness of the thumbprint cookies, providing a burst of brightness on your table.
- Cheese Platter: The combination of gooey brie or sharp cheddar with your thumbprint cookies invites a delightful contrast of flavors and textures, elevating your dessert experience.
Imagine savoring them alongside hot cocoa, as you watch the snow fall, each sip and bite warming your heart in a cozy embrace.
- Chocolate Truffles: These decadent bites intensify the chocolate experience and make for a lovely romantic pairing.
- Mint Tea: This herbal delight with its crisp flavors complements the cookies' sweetness while adding an aromatic quality that enhances your holiday feast.
- Gingerbread Cookies: Keeping with the holiday spirit, these spiced treats add an extra layer of festive fun, creating an irresistible dessert table.
- Sparkling Cider: A bubbly, non-alcoholic drink that adds festivity and pairs well with the cookie's sweetness, making any occasion feel special.
Expert Tips for Christmas Thumbprint Cookies
• Dough Consistency: Ensure the dough is soft and well-mixed without cracks. This prevents your Christmas thumbprint cookies from cracking during baking.
• No Jam? No Problem: If you forget to add jam before baking, simply re-indent the cookies with a teaspoon immediately after they come out of the oven.
• Chilling is Key: Don't skip the chilling step! Chilling the dough for 30 minutes helps the cookies maintain their shape and creates a better texture when baked.
• Keeping Fresh: Store your cookies in an airtight container at room temperature to keep them deliciously soft and fresh longer.
• Experiment with Flavors: Don't hesitate to switch up the jam or try the variations suggested; flavors like chocolate or key lime can make your Christmas thumbprint cookies even more special!
Christmas Thumbprint Cookies Variations & Substitutions
Feel free to get creative with this recipe and make it your own—it’s all about flavors that warm the heart!
- Nutty Twist: Substitute half of the butter with peanut butter for a deliciously nutty flavor that pairs well with chocolate filling.
- Chocolaty Bourbon: Mix in 1-2 tablespoons of bourbon into the dough for a rich, irresistible depth and fill with chocolate ganache.
- Fruit Fusion: Swap out raspberry preserves for mango, apricot, or fig jam for a fresh twist that brings tropical vibes to your holiday mix.
- Citrusy Zing: Use key lime or lemon curd as the filling for a zesty contrast to the sweetness of the sugar cookies.
- Vegan Option: Replace butter with coconut oil and the egg yolk with flaxseed meal mixed with water for a plant-based delight that doesn’t skimp on taste.
- Spicy Kick: Add a pinch of cayenne or cinnamon to the dough for a surprising, warming spice that makes your cookies stand out.
- Chocolate Delight: Fold in mini chocolate chips into the dough before baking for a delightful surprise in every bite.
- Gluten-Free: Use a gluten-free 1:1 baking flour instead of all-purpose flour to make these cookies suitable for gluten-sensitive friends without sacrificing texture!
How to Store and Freeze Christmas Thumbprint Cookies
Room Temperature: Keep your cookies stored in an airtight container at room temperature for up to 5 days to maintain their delightful softness and flavor.
Fridge: For extended freshness, store them in the fridge for up to 10 days. Allow cookies to come to room temperature before serving for the best taste experience.
Freezer: Freeze your Christmas thumbprint cookies in a single layer in a freezer-safe container for up to 3 months. Layer parchment paper between cookies to prevent sticking.
Reheating: To enjoy them warm, reheat in a preheated oven at 325°F (160°C) for about 5-7 minutes. This will bring back that fresh-baked goodness and delightful aroma!
Christmas Thumbprint Cookies Recipe FAQs
How do I choose the right jam or preserves for my Christmas thumbprint cookies?
Absolutely! For the classic version, raspberry preserves are a fan favorite due to their tartness balancing perfectly with the sweet cookie. You can also experiment with apricot, strawberry, or even seasonal flavors like cranberry or key lime. Just make sure the preserves are not too thick, as they might not fill the thumbprint nicely; they should be soft enough to spoon but not runny.
What’s the best way to store my Christmas thumbprint cookies?
I recommend storing your cookies in an airtight container at room temperature, where they’ll stay fresh for up to 5 days. If you want them to last longer, you can put them in the fridge, where they'll remain delicious for about 10 days. Allowing them to come to room temperature before serving will enhance their flavor!
Can I freeze Christmas thumbprint cookies?
Absolutely! For freezing, place your cookies in a single layer in a freezer-safe container and store them for up to 3 months. To prevent sticking, layer parchment paper between the cookies. When you’re ready to enjoy them, you can thaw them at room temperature or reheat them in a preheated oven at 325°F (160°C) for about 5-7 minutes to regain that fresh-baked texture.
What should I do if my cookies are cracking during baking?
Very! To prevent cracking, ensure your dough is mixed thoroughly and soft without any visible cracks. If you notice cracks already forming when placing them in the oven, pat them down gently to smooth the surface. If you forget to add jam before baking, no worries! Simply re-indent the cookie right after removing it from the oven and fill with jam at that point.
Are Christmas thumbprint cookies suitable for people with allergies?
While these cookies are delightful, they do contain common allergens like butter, eggs, and flour. If you're making them for someone with specific allergies, consider using dairy-free butter, flax eggs (1 tablespoon flaxseed meal mixed with 2.5 tablespoons water per egg), and gluten-free flour blends as alternatives. Always check for nut allergies when choosing your jam!
How can I make my Christmas thumbprint cookies more festive?
For a delightful touch, you can sprinkle powdered sugar on top after they cool or add festive colored sugars to the coating. You might also consider using fancy jam with metallic hues, like gold or silver, to make your cookies sparkle on the holiday table!
Irresistibly Easy Christmas Thumbprint Cookies to Delight!
Ingredients
Method
- Cream Together: In a stand mixer, cream together the softened unsalted butter, sugar, and light brown sugar until light and fluffy, about 3-5 minutes.
- Add Egg and Vanilla: Next, add the egg yolk and vanilla extract. Beat until well combined.
- Whisk Dry Ingredients: In a separate bowl, whisk together the all-purpose flour, cornstarch, and salt.
- Combine Wet and Dry: Gradually add the dry mixture to the wet ingredients on low speed until just combined.
- Roll Dough Balls: Roll the dough into 1 tablespoon-sized balls and place them on a wax-paper-covered plate or small cookie sheet.
- Sugar Coating: If desired, roll each ball in granulated sugar.
- Create Indentations: Press your thumb gently into the center of each cookie dough ball to make a thumbprint.
- Chill the Dough: Transfer the cookie dough to the freezer and chill for 30 minutes.
- Preheat Oven: Preheat your oven to 375°F (190°C).
- Heat the Jam: Heat the jam in the microwave for 5-10 seconds.
- Fill Thumbprints: Spoon the warmed jam into each thumbprint.
- Bake the Cookies: Bake at 375°F (190°C) for about 11 minutes.
- Cool Down: Allow the cookies to cool completely on the baking sheet before serving.
Nutrition
Notes
- Dough Consistency: Ensure the dough is soft and well-mixed without cracks.
- No Jam? No Problem: If you forget to add jam, re-indent the cookies immediately after they come out of the oven.
- Chilling is Key: Chilling the dough helps maintain shape.
- Keeping Fresh: Store in an airtight container at room temperature.
- Experiment with Flavors: Try different jams or variations.