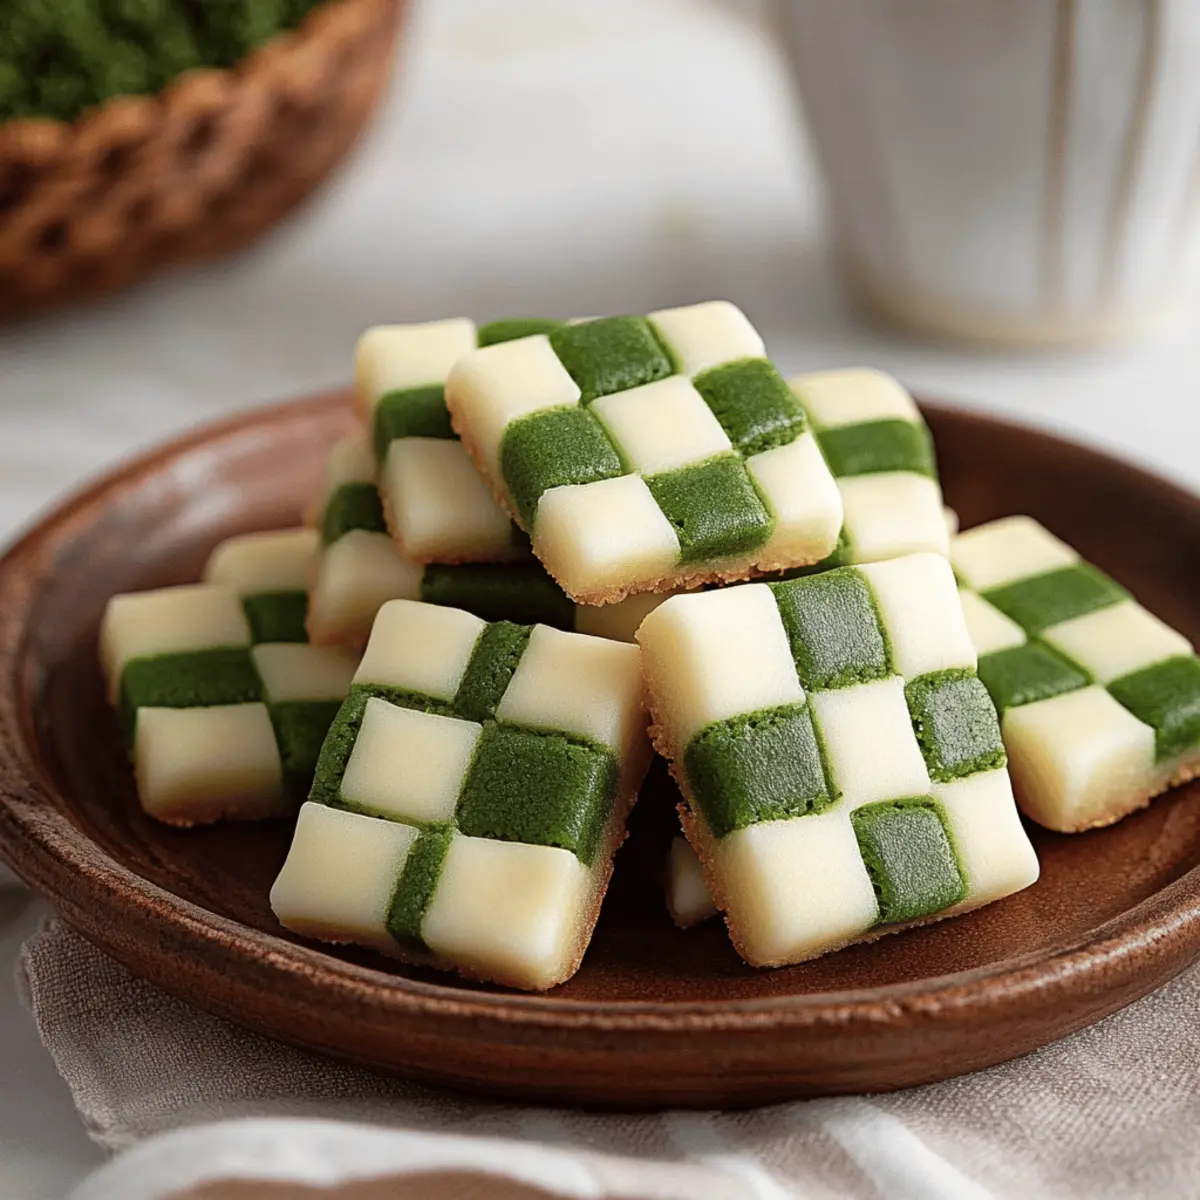
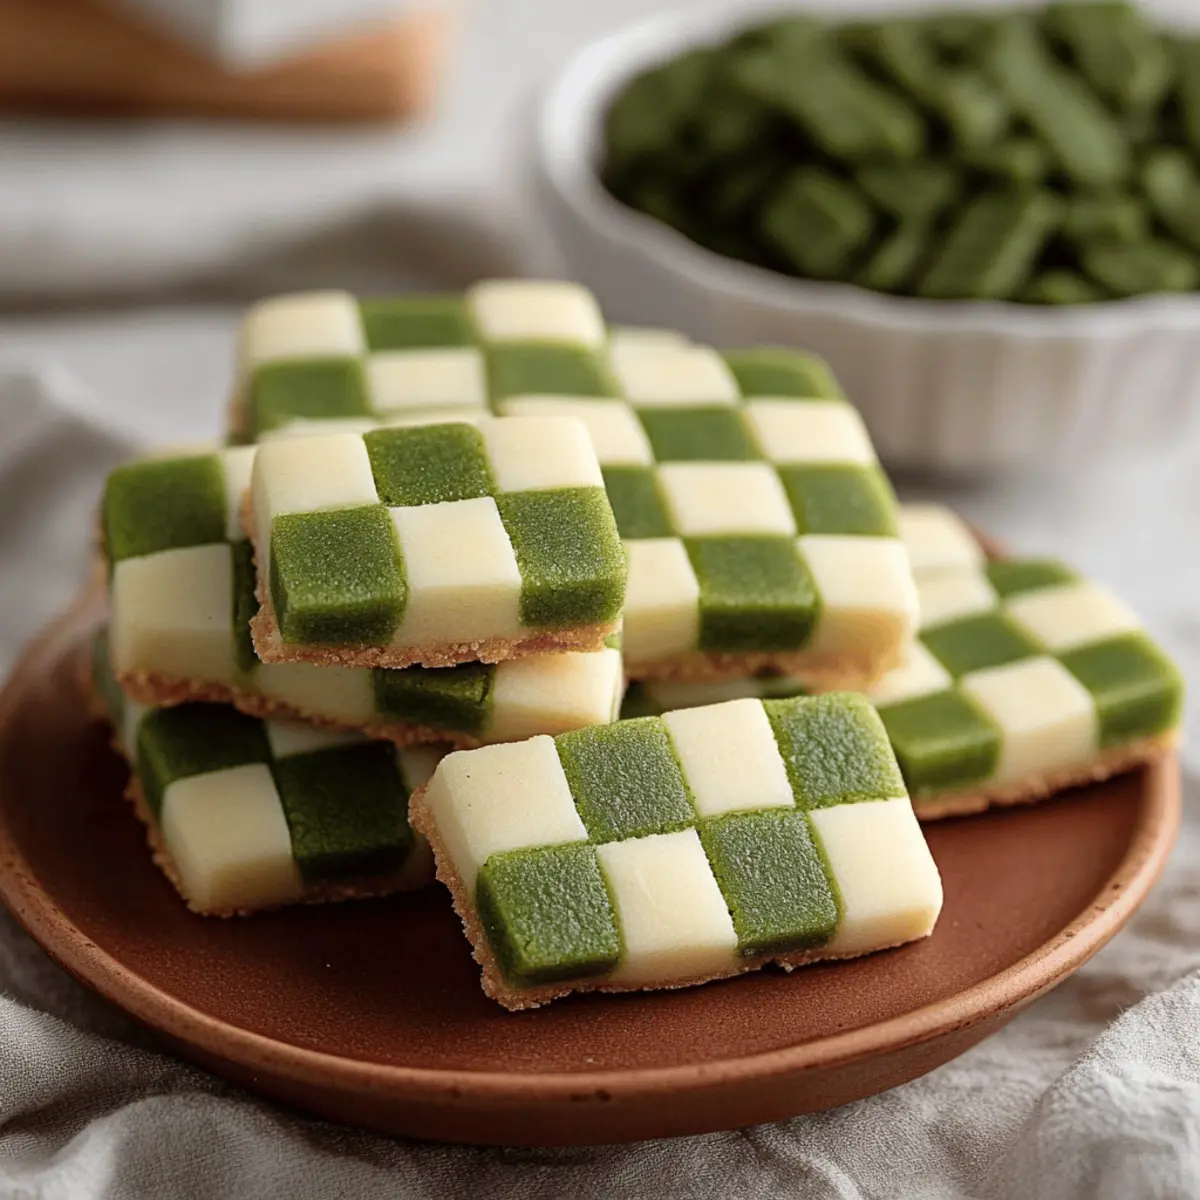
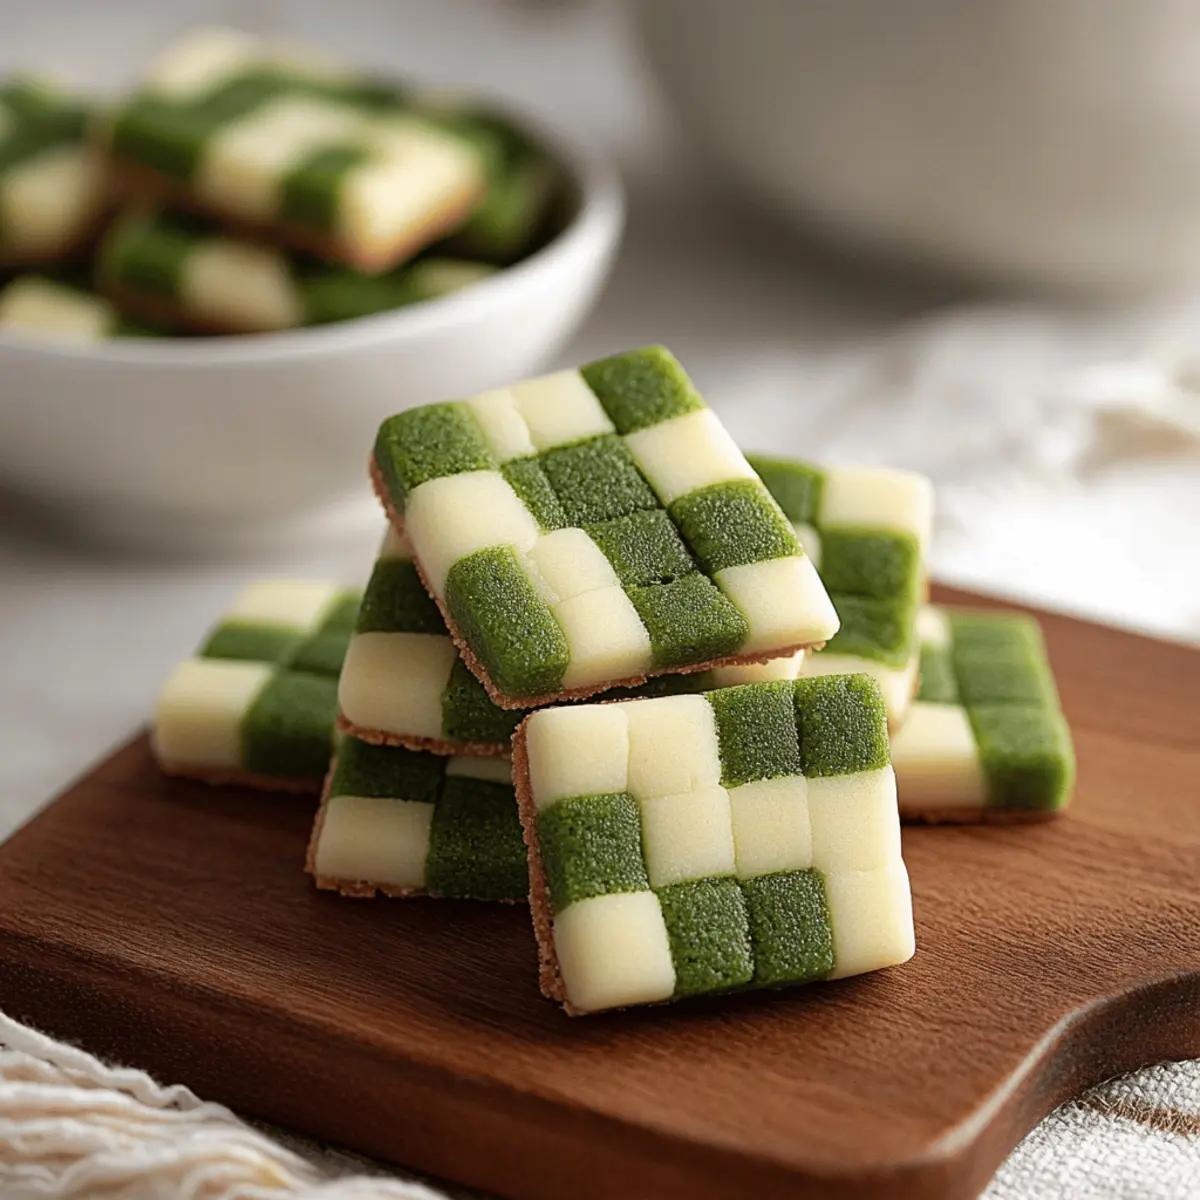
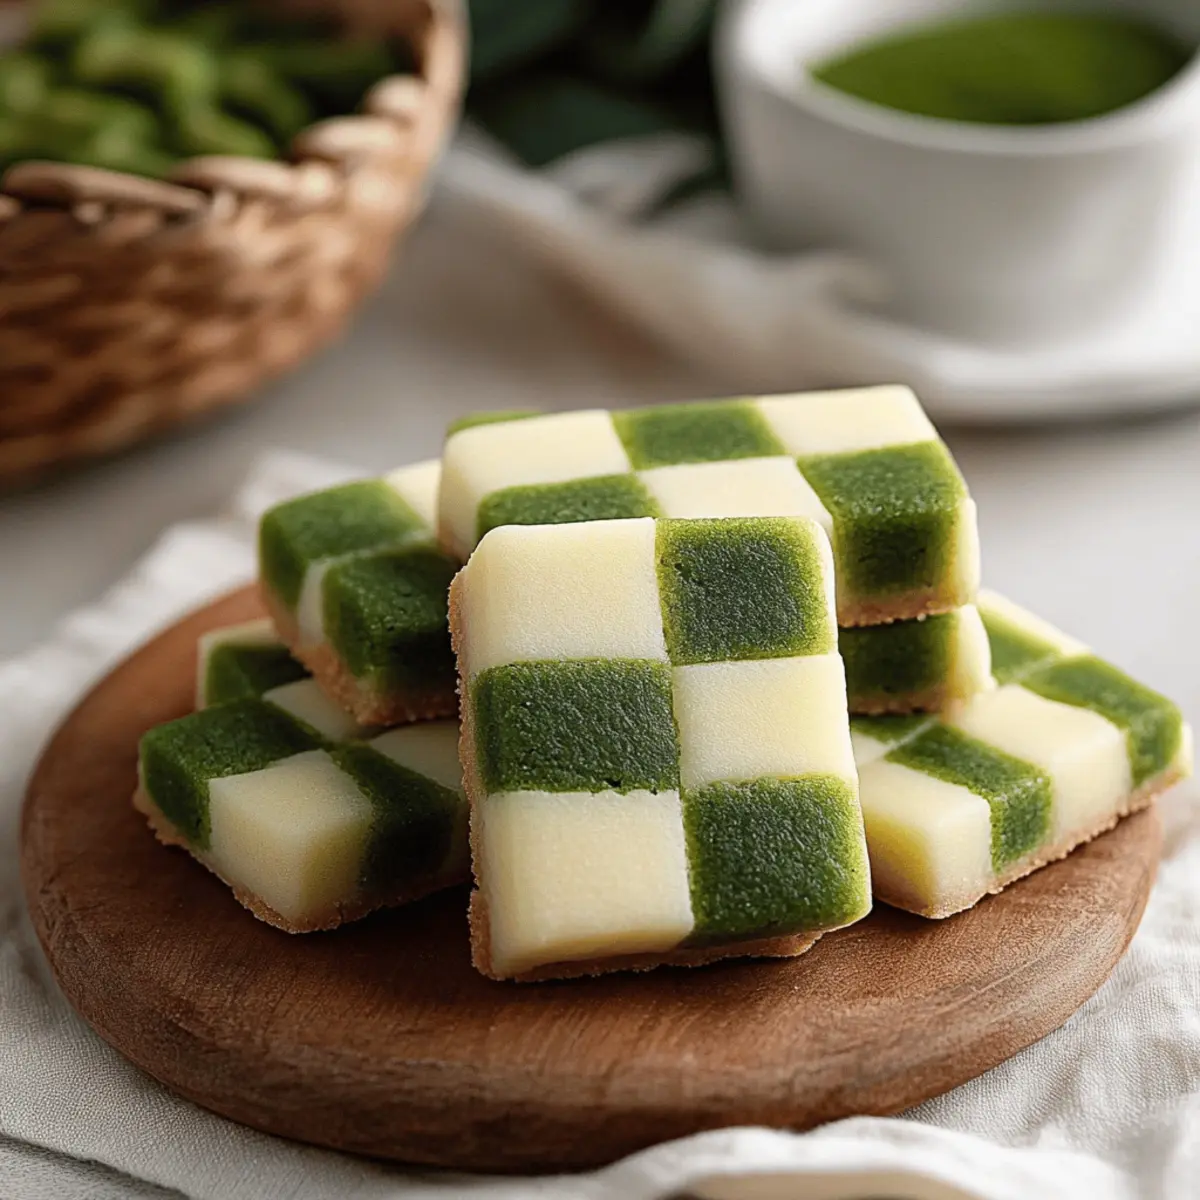
As the sun filters softly through my kitchen window, I can’t help but smile at the sight of my Matcha Checkerboard Cookies, perfectly nestled in a vibrant green and vanilla swirl. These delightful treats are not just a feast for the eyes; they bring a moment of calm and joy to my day. With a quick prep time and the ability to impress at any gathering, this recipe is a must-try for anyone looking to elevate their baking game. Plus, with that satisfying crunch followed by a soft, chewy center, it whispers sweet nothings to your taste buds while rejuvenating your spirit. So, are you ready to roll up your sleeves and create a checkerboard masterpiece that’s as fun to make as it is to eat?
Why Are These Cookies So Irresistible?
Visual Appeal: The stunning green and white checkerboard pattern makes these cookies a showstopper perfect for any occasion.
Unique Flavor: Featuring matcha’s earthy undertone blended with the sweetness of vanilla, they create a deliciously harmonious taste experience.
Fun to Make: The layering and cutting process is not just baking; it's a creative activity that can be enjoyed with family or friends.
Perfect for Sharing: With 26 servings, these cookies are ideal for gatherings, parties, or simply surprising your loved ones.
Quick Chill Time: The short chilling time means you can have fresh-baked cookies ready in just a couple of hours!
Join me in making these delightful Matcha Checkerboard Cookies, and check out some more baking inspiration in my other recipes!
Matcha Checkerboard Cookies Ingredients
For the Dough
- 300 g all-purpose flour – ensures a sturdy structure for the cookie layers.
- 230 g unsalted butter – brings richness and helps create a tender crumb.
- 100 g granulated sugar – sweetens the dough while creating that delightful chew.
- 1 egg yolk – adds moisture and richness to the cookie dough.
- 1 teaspoon vanilla extract – enhances the flavor and aroma, making each bite irresistible.
- ¼ teaspoon salt – balances the sweetness and enhances overall flavor.
- 20 g matcha powder – imparts that vibrant green color and unique earthiness to the cookies.
For Brushing
- Egg white – helps bond the dough layers together for a lovely checkerboard effect.
Get ready to wow your friends and family with these engaging Matcha Checkerboard Cookies!
Step‑by‑Step Instructions for Matcha Checkerboard Cookies
Step 1: Prepare the Dry Ingredients
In a medium bowl, whisk together 300 g of all-purpose flour and ¼ teaspoon of salt until combined. This creates a uniform powder that provides structure to your Matcha Checkerboard Cookies. Set this mixture aside as you focus on the next steps, ensuring you've got a solid foundation for your dough.
Step 2: Cream the Butter and Sugar
Using an electric hand mixer, beat 230 g of softened unsalted butter in a large bowl until it’s creamy and smooth, about 2-3 minutes. Gradually add 100 g of granulated sugar and continue to beat until the mixture is pale and fluffy. You want this to be light and airy, which helps create a tender cookie texture.
Step 3: Mix in the Egg Yolk and Vanilla
Add 1 egg yolk and 1 teaspoon of vanilla extract to the creamed butter mixture. Beat this on low speed until just blended, ensuring that the flavors meld nicely together without overmixing. This step infuses the dough with rich flavor, crucial for your Matcha Checkerboard Cookies.
Step 4: Combine Dry and Wet Ingredients
Gradually add the reserved flour mixture to the butter mixture, beating on low speed until just combined. Take care not to overwork the dough; you want it to hold together while maintaining a slightly crumbly texture that you can easily shape later.
Step 5: Divide and Color the Dough
Divide the dough into two equal-sized bowls. Leave one half as vanilla dough, and to the other half, sift in 20 g of matcha powder. Mix it on low speed until the matcha is evenly incorporated, transforming the dough into a beautiful green hue.
Step 6: Shape and Chill the Dough
Press each color of dough into rectangles on parchment paper, then roll them to about ¼ inch thick. Once shaped, refrigerate both rectangles for at least 1 hour until they are firm to the touch. This chilling step makes cutting easier and enhances the texture of your Matcha Checkerboard Cookies.
Step 7: Assemble the Dough Layers
Once firm, peel one dough sheet off the parchment paper and lay it on top of the other. Cut the layered dough in half, brushing the exposed edge of one half with egg white. This will help glue the two layers together, creating a beautiful checkerboard effect when you slice.
Step 8: Stack and Chill Again
Carefully alternate the layers that you created, stacking them to form a new block. Chill this stacked assembly in the refrigerator for an additional 15 minutes to solidify. This step ensures your Matcha Checkerboard Cookies maintain their shape during slicing.
Step 9: Cut and Layer the Strips
Remove the chilled block from the refrigerator and cut it into ¼ inch wide strips. Brush each strip with egg white before layering them alternately to form a more complex checkerboard pattern. Stack four layers high to create three blocks of beautifully interlaced dough.
Step 10: Final Chill and Preheat Oven
Once you have your blocks assembled, refrigerate them until firm again. Meanwhile, preheat your oven to 350°F (175°C) and line a baking sheet with parchment paper. This preparation means you’ll be ready to bake your Matcha Checkerboard Cookies soon.
Step 11: Slice and Arrange Cookies
Slice each block of dough into ¼ inch thick cookies. Place them on the prepared baking sheet, ensuring they are spaced about ½ inch apart. This gives each cookie room to puff and expand as they bake, enhancing the visual appeal of your finished Matcha Checkerboard Cookies.
Step 12: Bake and Cool
Bake the cookies in your preheated oven for 12-15 minutes or until the edges just start to brown. Remove them from the oven and let them cool on the baking sheet for 5 minutes before transferring to a wire rack. This allows the cookies to set perfectly, ready for you to enjoy.
Matcha Checkerboard Cookies Variations
Feel free to get creative with your Matcha Checkerboard Cookies and explore delightful twists that cater to your taste preferences!
-
Gluten-Free: Substitute all-purpose flour with a 1:1 gluten-free blend for a delightful, inclusive treat.
-
Vegan: Replace unsalted butter with coconut oil and the egg yolk with 1 tablespoon of ground flaxseed mixed with three tablespoons of water. These adjustments retain the richness and flavor while accommodating a plant-based diet.
-
Chocolate Swirl: Incorporate 20 g of cocoa powder into one dough half for a decadent chocolate twist in your checkerboard design. The contrasting flavors of chocolate and matcha create a delightful surprise in each bite.
-
Nuts for Crunch: Add chopped nuts like almonds or walnuts to the layers for an added crunch and nutty flavor, enhancing the texture and depth of these cookies delightfully.
-
Spicy Kick: Mix a pinch of cayenne pepper into the matcha dough for a surprising flavor boost that provides a warm, spicy finish. It's a fun way to awaken your taste buds!
-
Flavored Extracts: Try orange or almond extract instead of vanilla for an unexpected but delightful flavor pairing that harmonizes beautifully with matcha.
-
Decorative Finish: Top your cookies with a light dusting of powdered sugar for a charming finish, which visually pops against the rich green of matcha.
-
Dried Fruits: Incorporate dried cranberries or cherries into the dough for a sweet, tangy burst of flavor that complements the earthy matcha beautifully.
Embrace your culinary creativity and make these cookies truly your own!
What to Serve with Matcha Checkerboard Cookies
As you pull those colorful Matcha Checkerboard Cookies from the oven, let’s elevate your delightful dessert with some perfect pairings.
-
Fresh Berries: The tartness of strawberries or blueberries adds a refreshing contrast against the rich sweetness of the cookies.
-
Whipped Cream: A dollop of lightly sweetened whipped cream provides a luxurious touch that complements the cookies’ texture beautifully.
-
Green Tea Latte: The warm, creamy notes of a green tea latte harmonize wonderfully with the matcha flavor, enhancing the overall experience.
-
Dark Chocolate Ganache: Drizzling a bit of rich ganache adds depth, creating a contrast of flavors that will have everyone reaching for more.
-
Coconut Sorbet: This light, airy dessert contrasts perfectly with the dense, chewy cookies, offering a refreshing escape with every bite.
-
Almond Milk: Pour a glass of chilled almond milk for a nutty flavor that pairs well with both the green tea and vanilla notes in your cookies.
These combinations not only highlight the flavors of your Matcha Checkerboard Cookies but also create a heartwarming experience that friends and family are sure to enjoy!
Make Ahead Options
These Matcha Checkerboard Cookies are a perfect option for meal prep, allowing you to spend less time in the kitchen during busy weeks. You can prepare both the vanilla and matcha dough up to 24 hours in advance; simply wrap each dough rectangle tightly in plastic wrap and refrigerate. For the best quality, ensure they are well-sealed to prevent drying out. When you’re ready to bake, just assemble and cut the layers as the recipe directs. This way, you’ll have gorgeous, delicious cookies ready to impress guests or delight your family with minimal last-minute effort! Enjoy the flavors of freshly baked cookies while saving precious time!
Expert Tips for Matcha Checkerboard Cookies
Dough Temperature: Keep butter cold: Make sure your butter is softened but not melted; this helps create the perfect texture for your Matcha Checkerboard Cookies.
Layer Thickness: Roll evenly: Ensure each layer is rolled to an even ¼ inch thickness to achieve that marbled effect and uniform baking.
Chilling Time: Patience pays off: Don’t skip the chilling times! Proper chilling not only helps shape the cookies but also enhances their flavor and texture.
Egg White Application: Brush carefully: Use a light hand when brushing with egg white; too much can make the layers slippery and hard to stack.
Cutting Technique: Sharp knife needed: Use a sharp knife or a bench scraper for clean cuts; this prevents squishing the dough and assures pretty patterns in your Matcha Checkerboard Cookies.
How to Store and Freeze Matcha Checkerboard Cookies
Fridge: Keep your Matcha Checkerboard Cookies in an airtight container for up to 1 week. This preserves their delightful texture and flavor while keeping them fresh.
Freezer: For longer storage, freeze the baked cookies in a single layer on a baking sheet until solid, then transfer to a freezer-safe bag for up to 3 months. Thaw at room temperature before enjoying.
Reheating: To refresh cookies, warm them in the oven at 300°F (150°C) for about 5 minutes. This will help restore their crispness and flavor.
Storing Dough: If you want to prepare ahead, the unbaked dough can be wrapped tightly in plastic wrap and refrigerated for up to 2 days or frozen for up to 3 months. Just remember to thaw it in the fridge before using.
Matcha Checkerboard Cookies Recipe FAQs
What type of matcha should I use for the cookies?
Absolutely! For the best flavor and vibrant color, use culinary grade matcha powder, which is specifically designed for baking. This variety has a bolder taste and a lovely deep green hue that will shine through in your Matcha Checkerboard Cookies.
How do I know when the cookies are baked?
Very good question! Your cookies are perfectly baked when the edges just begin to brown. You’ll also notice a slight firmness at the center; they will continue to set as they cool. Aim for that light golden edge to ensure the best texture!
How should I store my Matcha Checkerboard Cookies?
I recommend placing your cookies in an airtight container and storing them in the fridge for up to 1 week. This will help maintain their delightful flavor and texture. If you need to keep them longer, you can also freeze them for up to 3 months!
Can I freeze the dough before baking?
Absolutely! If you want to prepare in advance, wrap the unbaked dough tightly in plastic wrap and freeze it for up to 3 months. When you're ready to bake, just thaw it in the fridge overnight before using. This saves time and ensures you have fresh cookies whenever you need them.
What if my dough seems too crumbly?
No worries at all! If your dough feels too crumbly, it may need a touch more moisture. Try adding a teaspoon of milk or water, mixing it in gently until it comes together. Remember, overmixing can lead to tough cookies, so mix just until combined for that tender texture.
Can pets eat matcha cookies?
It’s best to keep these Matcha Checkerboard Cookies away from pets. While matcha itself isn’t toxic, chocolate and certain sweeteners used in baking can be harmful to them. Always opt for pet-friendly treats if you want to share the joy of baking!
Irresistibly Easy Matcha Checkerboard Cookies to Impress
Ingredients
Equipment
Method
- Prepare the Dry Ingredients: In a medium bowl, whisk together 300 g of all-purpose flour and ¼ teaspoon of salt until combined.
- Cream the Butter and Sugar: Using an electric hand mixer, beat 230 g of softened unsalted butter in a large bowl until creamy. Gradually add 100 g of granulated sugar and continue to beat until pale and fluffy.
- Mix in the Egg Yolk and Vanilla: Add 1 egg yolk and 1 teaspoon of vanilla extract to the creamed butter mixture. Beat on low speed until just blended.
- Combine Dry and Wet Ingredients: Gradually add the reserved flour mixture to the butter mixture, beating on low speed until just combined.
- Divide and Color the Dough: Divide the dough into two equal bowls. Leave one half as vanilla dough, and sift in 20 g of matcha powder to the other half.
- Shape and Chill the Dough: Press each color of dough into rectangles on parchment paper, roll to about ¼ inch thick, and refrigerate for at least 1 hour.
- Assemble the Dough Layers: Peel one dough sheet off the parchment paper and lay it on top of the other. Cut in half and brush the exposed edge with egg white.
- Stack and Chill Again: Stack the layers to form a new block and chill in the refrigerator for an additional 15 minutes.
- Cut and Layer the Strips: Cut the block into ¼ inch wide strips and brush each strip with egg white before layering alternately.
- Final Chill and Preheat Oven: Refrigerate the assembled blocks until firm, then preheat your oven to 350°F (175°C).
- Slice and Arrange Cookies: Slice each block into ¼ inch thick cookies and place them on the prepared baking sheet.
- Bake and Cool: Bake for 12-15 minutes until the edges just start to brown and cool on the baking sheet for 5 minutes.